Category Archives: technologies

Coin Operated Spending Unleashed

Posted on by 0 comment

Back on December 20th, 2013, I came across an ad in Facebook (yes I do click some of them) selling the concept of carrying a single payment card for every purpose (key to a slimmer wallet).  It was early in the campaign so the price was $50 instead of the full $100 that it was expected to cost later so I bought in to Coin’s crowd funding campaign. I paid the $50 for my Coin thinking I’d receive the card in Spring 2014.

Then in 2014 there was a huge kerfuffle over the news to backers that Coin wouldn’t be able to make their original shipping dates. They instituted a beta program for the earliest backers (only about 50 if I recall correctly) and later it was pretty clear they were struggling to ensure the product actually worked as advertised.

In the meantime Apple announced Apple Pay in September 2014 with the iPhone 6 and Apple Watch, which promised to provide a potentially even better experience than a multi-network card (ie: Coin) because it was technology embedded in something you carry anyway (your phone or watch). A friend of mine who also pre-ordered a Coin took advantage of the return option, getting his $50 back and used that to help cover the cost of his new Apple Watch which he uses to buy things at retail locations.

I’ll admit that I’m pretty fond of most of the Apple products. I grew up with PC’s and after spending most of my career managing PC-based computer networks I switched to Mac at home.  Today, our household consists of several iPad’s, a couple of MacBook Pros, an iMac or two, multiple iPhones, two AppleTV’s, and no less than four Airport Extreme routers. But I could not really justify purchasing an Apple Watch right away; it’s just a bit too expensive for a watch when I normally don’t wear a watch. And I couldn’t upgrade to an iPhone 6 any time soon because my mobile phone is actually provided by my employer. So Apple Pay was not available for me any time soon.   With no Apple Pay option, I let my Coin pre-order ride on.

Fast forward to Monday Sept 14, 2015. I opened the mailbox and I found my long overdue Coin. After all the delays they actually finished production and beta testing, and shipped the darn thing. In addition, they revamped the hardware in the process, specifically (and significantly I might add) adding NFC wireless. This means the Coin 2.0 card functions a lot more like Apple Pay because you can just hold it up to the reader rather than swipe it.

IMG_6886

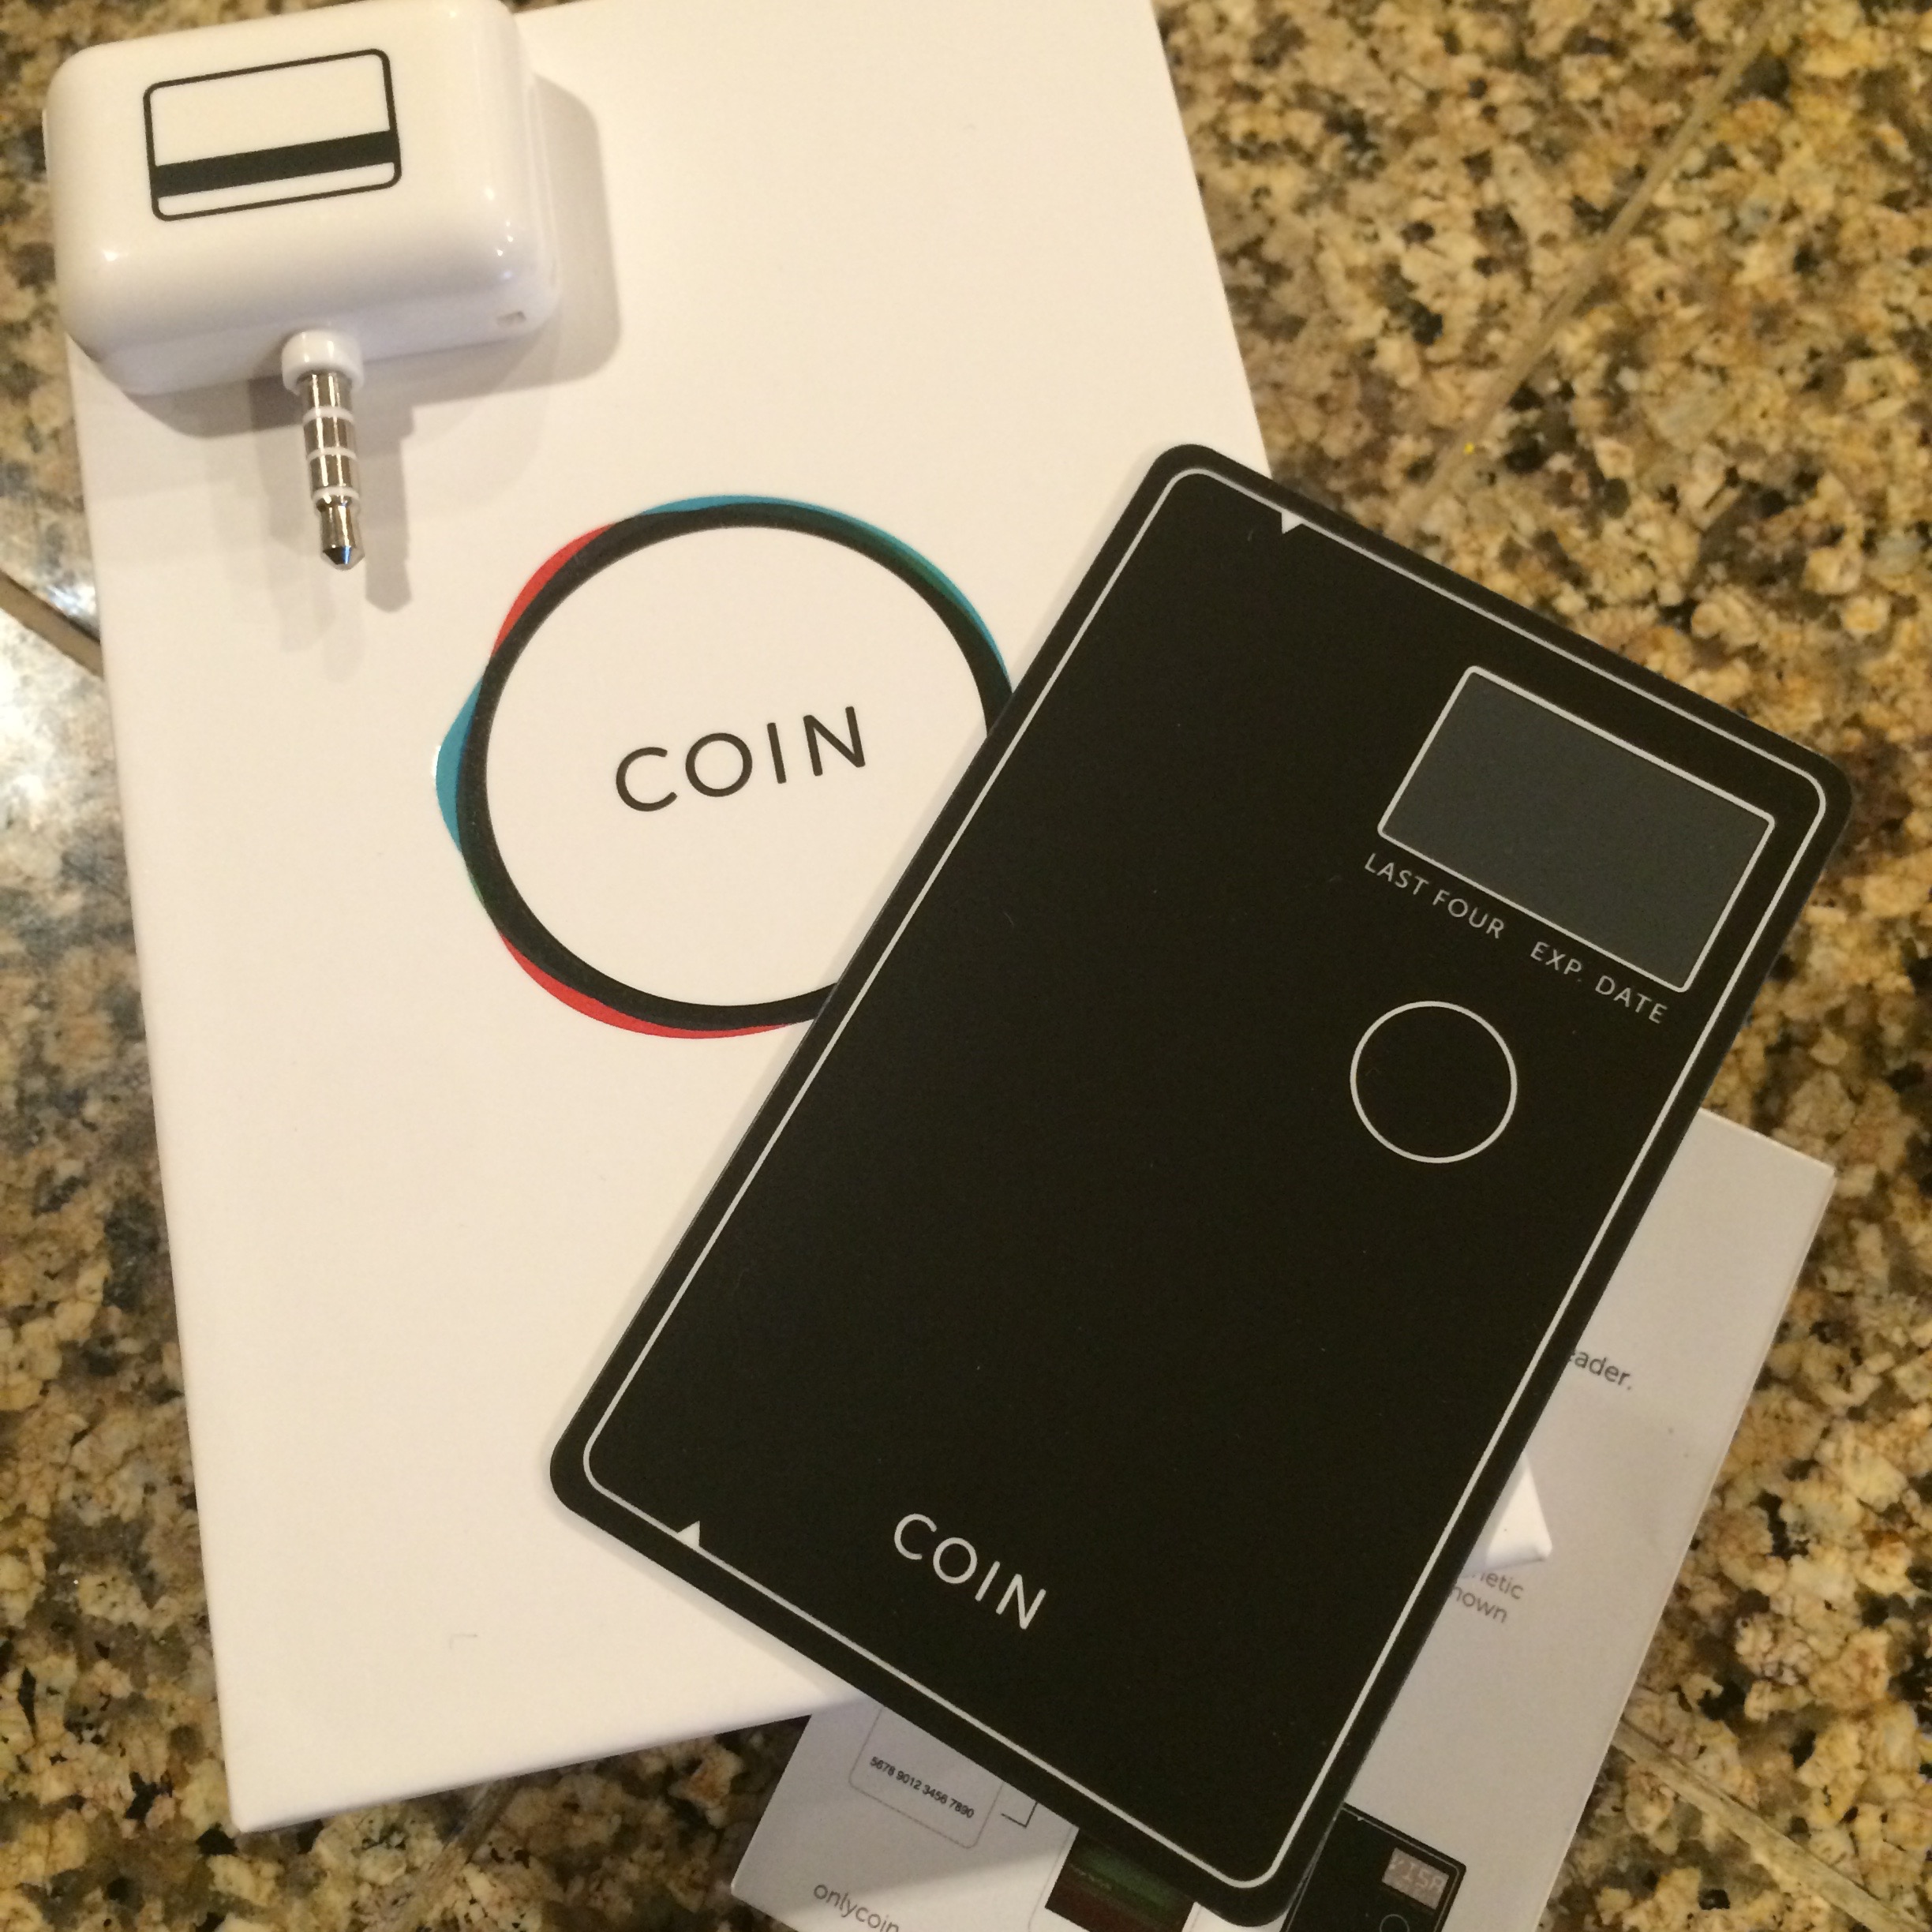
Unboxing the device is sort of Apple-esce. The box is white and far more upscale than it needs to be for a glorified credit card. A credit card mag stripe reader for your mobile phone is included with the card so you can swipe your credit cards to the Coin app which then sync’s the data to the Coin.

IMG_6916
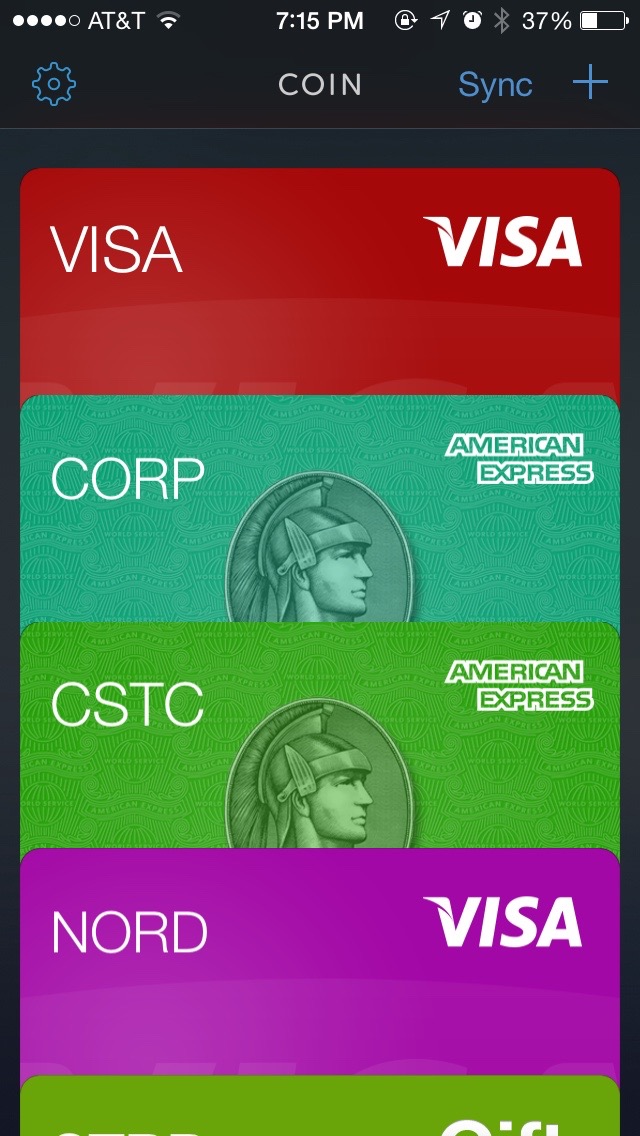
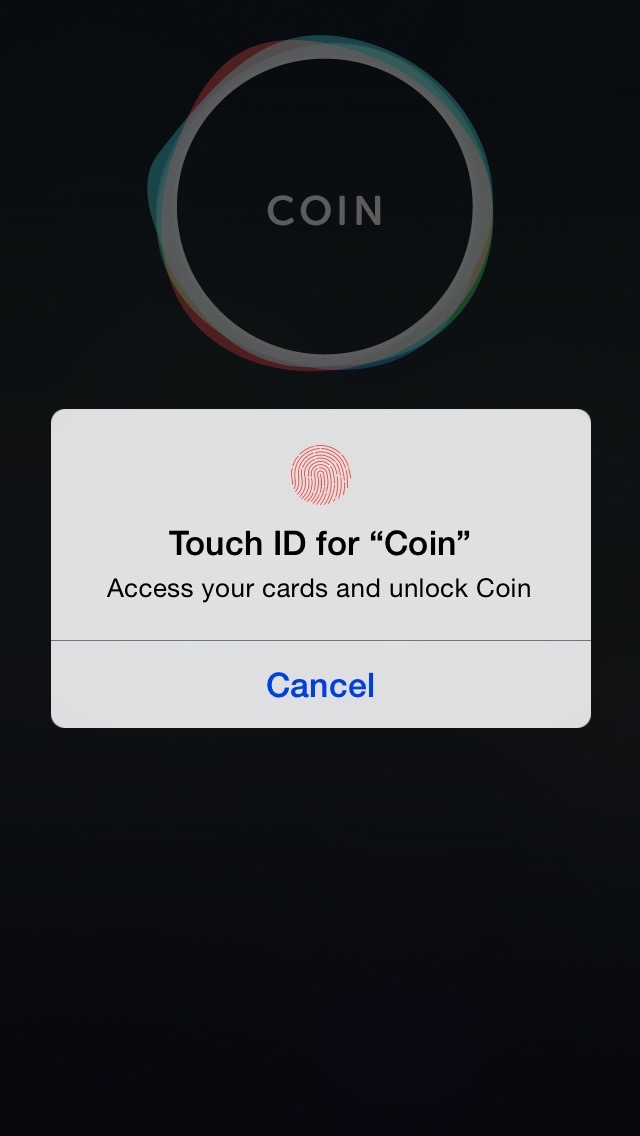
Setting it up is very simple – in fact a bit too simple really because at first I sort of stared at the app looking for a way to pair my phone with the Coin and I couldn’t find it.   All the app wanted me to do was add my credit cards. Turns out it’s pretty much that simple, you swipe each card, giving each one a nickname, and then click Sync. Sync pairs up the Coin with your phone and loads your cards into it and it’s all set.

Another new feature in Coin 2.0 that was not originally expected was support for gift cards and membership cards.

After that I was all set to go out and spend Coin.  I’ve added two VISA cards, two AMEX cards (a personal and a corporate card), a debit card, and my Starbucks Gold Card. Time to test them out in the real world.

IMG_6887I spent the last two days with my Coin and my experience so far is, well, seamless.. and ultimately that’s a good thing.

Yesterday I headed out for lunch and used Coin to pay for parking with a kiosk, then to pay for the meal. The waitress didn’t even seem to notice, and it worked fine.   We then walked over for gelato and again, no notice from the girl who rang us up using my Coin as a VISA.

Today I went to lunch again, but this time it didn’t work. The waitress said it was the second one she’d seen and thought it was pretty cool, but alas I had to pull out my real VISA card. Then I decided to try using it at Starbucks as my Starbucks Gold Card (effectively a gift card).   I had to make sure the barista knew to treat it as the gift card but it worked just fine. And right after that I headed to the DOL to renew car tabs and no issues. The woman at the DOL was super-curious and wanted to know how to find one. So we’re 5 for 6 so far.

IMG_6915
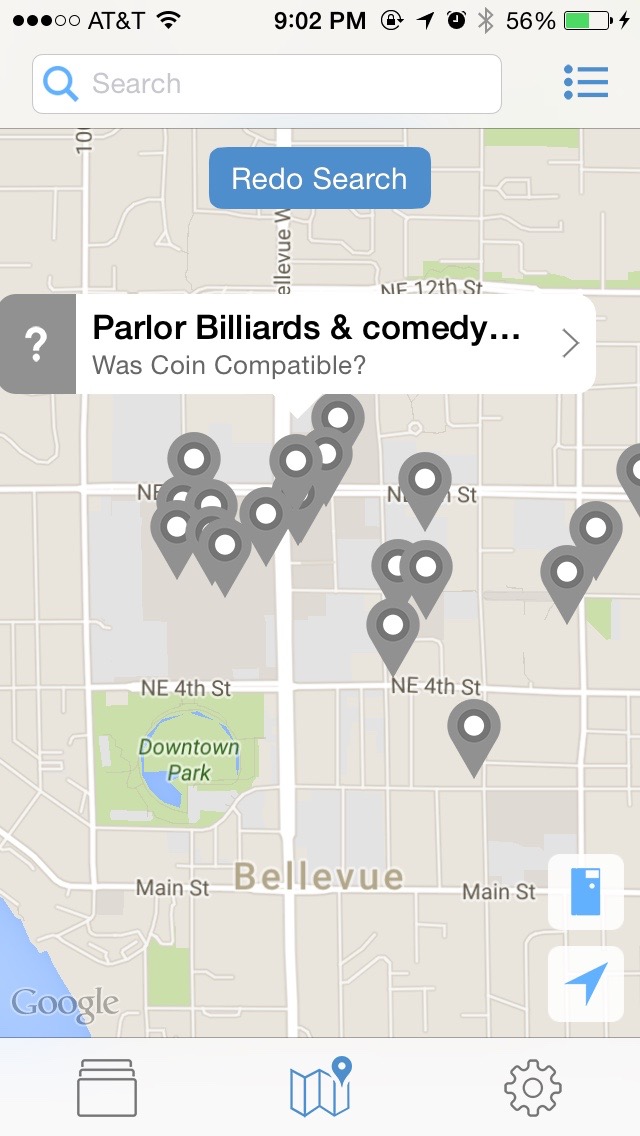
One nice thing is the map in the Coin app let’s you check to see if someone’s Coin was successful at a particular establishment, and you can tap on a place or search for one and report your own experience for others.

So far I like it, I also got my Wally Bifold slim wallet today so I look forward to a slightly more sleek cash and Coin carrying experience.

One Month With a Solar Home – 1.82MEGAWatt(hours)!

Posted on by 0 comment

Version 2

Well, it’s been just over a month since the solar system came online..

In the 33 days that the solar system has been online, we’ve generated a total of 1817kWh from the panels.. Due to line losses and differences in measurement intervals and such the PSE Production meter has registered 1724kWh.

  • For the Washington State REAP program that we are participating in, that 1724kWh translates to ~$930 in state incentives generated so far.

The PSE Net meter which is what our monthly power bill is based on has two useful values..

  • First, we’ve pushed a total of 1205kWh of excess solar power to the grid. This means that from the solar power itself, during the day, we’ve consumed 519kWh that came straight from the solar panels and didn’t have to be pulled from the grid.
    • On a more grand scale, the full 1205kWh is power that didn’t have to be generated somewhere by a Nuclear, Gas, Coal, etc power plant.  What happens if you scale that up to more homes?
  • Second, we pulled a total of 602kWh during the same period, primarily at night when the solar panels are not generating any power.
    • Now, what if the excess we pushed into the grid above was stored at the power company’s neighborhood substation in a bank of batteries (Tesla Energy?) and then this power that we pulled at night came from those batteries.  Suddenly the power generation get’s much simpler and demand spikes are smoothed out…  But I digress.

So our total consumption of power during the 33 days was about 1121kWh, and we generated 1724kWh.   Due to how net metering works, our electric bill will now have a credit equal to 602kWh. Unfortunately, because the power company fiscal year is July through June, this credit is more or less a throw-away.. It get’s zeroed out at the end of June. But going forward from July until June 2016, as we generate more credit we will be able to consume that credit during the winter months as needed to cover the difference between what we generate and what we consume.

Oh, it’s freakin’ HOT here right now compared to normal, and we have no AC, so the furnace fan and about four other fans are all running pretty much non-stop. This combined with charging our electric car (actually a very small amount of power) is pushing our power consumption up a bit higher than normal. Typically we consume about 100kWh more in August than in other months due to running the fans, but we’ve had a very warm spring, today (July 1st) it’s 92F here and the average is only 73F. The record for this day, prior to today was only 84F.

At $0.10/kWh, we would have paid about $100 for electricity. But instead the power we pushed to the grid has more than offset that and our bill will essentially be ~$7 for the base connectivity charge.

You can browse around my online solar reports if you want – StorageSavvy’s Solar Dashboard

StorageSavvy is going green! I see the light!

Posted on by 1 comment

Through a series of discussions with a friend who was evaluating solar for his home, doing some calculations, and discussing with the local contractor, I bit the bullet last month and got a 9800 watt solar array installed on our house here in the Pacific Northwest.  While pricey up front there are a number of incentives available from the Federal government as well as Washington State that effectively pay for the entire system.  I’ll write-up the cost analysis later but for now let’s take a look at the performance of the system..

Version 2The roof of our house has 4 sides with trees lining the entire East side of the property, causing some shading in the morning.  The majority of the North and South sides are clear and the West side is completely open.  Due to this, the 35 x 280 watt panels cover pretty much the entire West roof and a large portion of the South roof.  Our system uses the more expensive micro-inverters in order to handle shading of a single panel without affecting the rest of the system.  Aside from more efficiency in shading situations, the micro-inverters have about double the life of the less-expensive in-line inverters.  Our system is also grid-tied and we do not have any batteries involved.  Since the micro-inverters push 240VAC power down from the roof, the interconnection with our panel is very simple.  In order to take advantage of Washington State’s solar incentive the local power utility (Puget Sound Energy) installed a “Production Meter” that measures how many kWh’s the system generates irrespective of how it gets used.  And in order to take advantage of the grid-tied solar system to reduce my power bill they installed a new digital “Net Meter” that tracks both how much power I consume from the grid and how much our system pushes TO the grid.  The difference between those numbers determines the actual billed amount each month.

For example, if we push 1000 kWh into the grid during the month, and pull 900 kWh, then our bill that month will show a credit equal to 100 kWh.  That credit can be used in a later month (ie: the winter months) when we might be consuming more than we generate each day.

At about 7pm PT today pulled statistics from the micro-inverters as well as the current readings on the ‘net’ and ‘production’ meters.  The system came online during the morning of May 29th.  The cumulative numbers for the past ~12 days are as follows..

  • Production Meter
    • 580 kWh‘s generated by the solar array
  • Net Meter
    • 378 kWh‘s pushed to the grid
    • 205 kWh‘s consumed from the grid

Doing the math, this means we’ve consumed approximately 387 kWh in that time from all sources (grid + solar).  The summer has pretty much started here so at least for this time of year we are clearly generating significantly more that we consume.  The winter months will be different of course.  This also translates to a 173 kWh credit on our electric bill so far.

Let’s take a look at how the system performs on different days and at different times of day..

First, here is a look at how many kWh’s we are generating per-day.  You will see that there are some stormy, rainy, cloudy, dark days mixed in with the other more sunny days..

kwh-per-day-solar

Now here are two charts, the first showing the amount of power being generated in watts through a 24 hour period on a nice sunny day and the second showing the number of kWh’s generated in each particular hour.

watts-24hours-sunny

You may notice the dips around 9am and 11am.  These are caused by the south side panels being partially shaded at those times as the sun moves across the sky.
kwh-per-hour-sunnyHere are the same two charts for the darkest, cloudiest, rainiest day we had a quite a while.

watts-24hours-rainy

As the clouds and rain change through the day, you can see that the power generated is all over the place.  I was impressed that we still achieve over 7000 watts mid-afternoon on that day, if even for a short time.

kwh-per-hour-rainyWhen you consider that there are comparably few days this bad in a given year, and we still generated about 75% of our average daily consumption rate, things are looking pretty good for an overall annual low electric bill.

All in all pretty promising — and we recently leased a new all-electric BMW i3 which we charge about once every 3 days.  That charging activity is included in all the above numbers so we are essentially powering the i3 entirely from the sun.  On the flip side, our house contains probably 50 x 65w can lights of which only a few have been converted to LED so far.  We could certainly reduce our power consumption a bit more if we converted more of our lighting to LED.  But there is a cost to that of course and it’s a long-term project.  Assuming our annual out-of-pocket electric cost ends up being zero, there’s really no ROI on replacing our bulbs with LED before the existing bulbs fail on their own.

More on this project later.


What your Nest could have told you but didn’t

Posted on by 10 comments

So you picked up a Nest at the store, or online, because you realized (or thought maybe) that you could save some money on your heating or cooling bills, and/or the possibility of remote controlling your home HVAC from your phone was pretty slick.

Now I won’t really spend much time on the energy/cost savings (or possibly lack thereof) related to using a Nest vs. any other programmable thermostat but suffice it to say I’m dubious as to whether Nest will actually save me any money in its lifetime. But that’s not why I got it.. Being able to remotely set the furnace to away and bring it back to life as needed from my mobile phone is interesting enough to me. Combined that with energy consumption statistics and I can see at least enough benefit to warrant trying it out.

Further, I am supporting a startup project called Ecovent which integrates with Nest and will allow individual control of the temperature in each room of our house. No more cold office with an overheated living room…

Anyway, I picked up the Nest while upgrading my wife’s mobile phone because I was able to bundle my items together for a little discount. At home I spent just under 10 minutes installing it, it really IS easy! Perfect, looks great, and seems to work just fine. It was evening so I set the temp to 60˚F and left it alone for the night.nest-online

The next morning I set the furnace to 69˚F from my phone before I got out of bed and started getting ready for the day. From 7am until about 10am the furnace turned on and off, on and off, repeatedly, but the house never got any warmer.   The Nest itself seemed fine with no errors on screen. I turned the knob up a bit and it said it was heating but still same result. I gave up on it for most of the day thinking maybe it was learning how quickly or slowly the furnace raises the temperature. WRONG!

Later in the evening it was still not working so I Google’d around a bit (yes I use Google so I can use the big G) for this issue and found a few notes in discussion forums. I didn’t find anything useful on Nest’s website (although I searched today, and found this KB article) itself regarding this issue, and calling customer support is always my last resort because I’ve found that most of the time customer support organizations don’t know their own product much better than I can figure out on my own with the Internet at my disposal.

What I did find on the discussion forums indicated that the problem was that there wasn’t enough power available in the control circuit and/or board to fire up the gas burners. And the furnace is designed to shut down the fan and heat cycle after two minutes if the burners haven’t ignited. I also saw several Nest owners comment that they had to call out HVAC repair technicians to figure out what the problem was, presumably at a fairly hefty cost. The good news is that I was able to determine the cause and fix the problem myself, and I’ll describe that here. It’s quite simple, however the caveat is that your house may not have the thermostat wiring in the walls that you need in order to fix it, which means running a new wire, decidedly more involved than if you already have the wiring in place.

First, the ultimate issue is that the Nest consumes more power than a typical thermostat. It has a color screen with backlighting, an actual CPU running an operating system, and a WiFi radio. It also has a rechargeable battery embedded to keep it running when you remove it from its wall base, or when the power is out.   The power to run the Nest AND charge the battery comes from the 24VAC Control board in the furnace. Since the Nest uses more current (amperage) than normal and that current comes from the same power source as the current required to turn on relays for the fan and ignite the burners, open gas valves, this is where we get into problems.

The Sequence goes like this…

  1. The Nest is using power all the time
  2. If the battery is still charging for some reason it’s using even more power
  3. At some point Nest decides it’s too cold and sends the Heat signal to the furnace, sending this signal takes some more power
  4. After the furnace fan has been running for a few seconds it’s time to ignite the burner.  This takes a bit more power (close relay to heat up igniter, close relay to open gas valves)
  5. But now the power in the circuits going through the Nest doesn’t have enough current left to do this, and the voltage has dropped as a result so the relays don’t actually close… and the burners never get gas and/or the igniter doesn’t heat up.
  6. Two minutes pass and the furnace senses that the burners still aren’t lit and shuts down.
  7. Lather, Rinse, Repeat

You can determine very quickly with Nest if this is going on by looking at the technical data screen..

nest-power-bad

Notice the Voc and Vin are wildly different.. this means that the AC sine-wave is fluctuating, ie: voltage is dropping. And the Lin is a current measurement showing 20mA.. According to online discussions this should be around 100ma.

The fix for this is to add power. The most common method of doing that is to connect the blue “C” common wire between the furnace and the Nest. This makes it so that the Nest doesn’t steal/rob it’s power from the same lines that are used to control the heat and fan.

furnace-wiring-fixed-blue

nest-wiring-fixed-blue

You will notice I already had an extra blue wire in the wall, but it wasn’t in use, so I connected it at both ends.

Now look at the Voc and Vin and Lin values..

nest-power-fixedThe Voc and Vin are very close, so the AC sine-wave is stable and Lin is 100mA.. This is how it should be and now the furnace works perfectly.

So hopefully if you run into this, now you know how to resolve it. Unfortunately, if you don’t have a spare wire you are going to have to run a new wire through the wall, which will be somewhat, or very, difficult depending on your home.

Being very new, my Nest is a Gen 2 device, and some of the discussions indicated that the Gen 1 devices did not originally have this problem, and then following a software upgrade sometime in the recent past the problem started occurring.  The fix was the same.

After this experience I sent some feedback to Nest about this.

  • It seems common enough of a problem that it should be mentioned in the install guide. Common issues and their solutions should be readily available to self-install homeowners.
  • It also seems like the Nest software could very easily detect this issue. It already monitors the Voc, Vin, and Lin values obviously, and it knows how often the furnace is cycling. It would take very little code to detect the combination of factors and display an alert on the screen and an iPhone notification that there is a power issue, with a knowledge-base article # referenced to read about it. The Nest doesn’t do this so unless you are observant or it’s really cold outside it could linger for days or weeks without you realizing it. And you will find out when it’s really cold, the furnace won’t heat, and you won’t know why.

Otherwise, I think the Nest is pretty slick and I’ll be monitoring to see how it affects my energy bill, if at all.


Footnote: You can type a ˚ on Mac OS X with Option-K or a ° with Option-Shift-8 

The Flashing Clock Conspiracy

Posted on by

As I was driving to the office the other day I glanced at my iPhone and then back up to the dash, noticing that the clock in my car was a couple minutes off. ‘Gah! Why can’t the clock in my car keep time?’ This got me thinking about all of the devices in my life that have clocks built-in and the constant need to set and re-set them.

The proverbial “Big Bang” in the clock setting drama was when the very first VCR in the world was plugged in and it’s built-in clock started flashing “00:00”. After that the flashing clock syndrome has become a part of pop-culture and the problem has proliferated. Whenever there is a power outage, or electrical work requiring a breaker to be turned off in the house, I find myself asking the same question, “Why don’t these clocks synchronize themselves?” So I took a look at the evolution of time synchronization up to now.

  • Radio Broadcasters have been getting time, among other signals, from the US Atomic Clock since NIST began broadcasting time within radio signals across the US in 1945
  • In 1974, NIST began broadcasting time from NOAA satellites
  • In 1988, NIST began offering network time (Telephone and later Internet based)
  • In 1994, the GPS Satellite system became fully operational and due to it’s heavily reliance on accurate time, it became another source of very accurate time. Even cheap handheld GPS receivers get their time directly from the GPS satellites.
  • Mobile phones have been getting their time from the cellular network since at least the 90’s. Today’s smartphones and tablets use both the cellular network as well as Internet time (NTP) similar to personal computers.
  • Windows (Since Windows 2000), Mac (Since Mac OS 9 mainly), and Unix/Linux computers can set their own time from the network (NTP).

So as I look at all of the clocks I have in my life, I’m left wondering why I still have to set their time manually. For example…

  • My 4-year old BMW 535i has a built-in cellular radio, GPS receiver, satellite radio antenna, Bluetooth, and a fiber-optic ring network connecting every electronic device together. It can send all sorts of data to BMWAssist in the event of a crash or need for assistance, and it can download traffic data from radio signals. With all these systems available and integrated together, it can’t figure out the time?
  • Our Panasonic TV has Ethernet and Wi-Fi connectivity to connect to services like Netflix, Skype, Facebook, etc. Why doesn’t it use the same NTP servers as my Mac and Windows computers to get the time?
  • Our Keurig coffee maker has a clock so that it warms up the boiler in the morning before I wake up. The warm up feature is great but we unplug the Keurig sometimes to plug in other small appliances and then the clock needs to be set again when it’s plugged back in or it won’t warm up. Why not integrate a Bluetooth or small Wi-Fi receiver to get network time?
  • The Logitech Harmony Remote control we have in the living room has USB, RF, and Infrared and a clock that is NEVER correct. Hey Logitech, add a Wi-Fi radio, ditch the USB connection, let me program the remote over Wi-Fi, and sync the time automatically.

Actually, these last three got me thinking, consumer electronics manufacturers should come up with an industry standard way for all devices to talk to each other via a cheap, short range, low-bandwidth wireless connection (Bluetooth anyone?). It could be a sort of mesh-network where each device can communicate with the next closest device to get access to other devices in the home, and they could all share information that each device might be authoritative for. One device might be a network connected Blu-Ray player that knows the time. Other devices might know what time you wake up in the morning (the Keurig for example) and provide that information so that the cable box knows to set the channel to the morning news before you even turn on the TV. And synchronize all of the clocks!!!

But then, I have to wonder why some devices even need a clock?

I understand why the oven has a clock since it has the ability to start cooking on a schedule, but why the microwave? Most microwaves don’t have any sort of start-timer function, so why do they need a clock? There are already so many clocks in the house; I’d argue that adding one to a device that doesn’t need it is just creating an undue burden on the user. For the love of Pete! If there is no reason for it, and it doesn’t set itself, leave the clock out!

What say you?

Building Blocks – Part VI: But my #PrivateCloud is too small (or too big) for building blocks!

Posted on by

Does your Building Block need a Fabric? <- Part 6

Okay, so this is all well and good, but you have been reading these posts and thinking that your environment is nowhere near the size of my example so Building Blocks are not for you. The fact is you can make individual Building Blocks quite a bit smaller or larger than the example I used in these posts and I’ll use a couple more quick examples to illustrate.

Small Environment: In this example, we’ll break down a 150 VM environment into three Building Blocks to provide the availability benefit of multiple isolated blocks. Additional Building Blocks can be deployed as the environment grows.

150 Total VMs deployed over 12 months
(2 vCPUs/32GB Disk/1GB RAM/25 IOPS per VM)

    • 300 vCPUs
    • 150GB RAM
    • 4800 GB Disk Space
    • 3750 Host IOPS

Assuming 3 Building Blocks, each Building Block would look something like this:

    • 50 VMs per Building Block
    • 2 x Dual CPU – 6 Core Servers (Maintains the 4:1 vCPU to Physical thread ratio)
    • 24-32GB RAM per server
    • 19 x 300GB 10K disks in RAID10 (including spares) — any VNXe or VNX model will be fine for this
      • >1600GB Usable disk space (this disk config provides more disk space and performance than required)
      • >1250 Host IOPS

Very Large Environment: In this example, we’ll scale up to 45,000 VMs using sixteen Building Blocks to provide the availability benefit of multiple isolated blocks. Additional Building Blocks can be deployed as the environment grows.

45000 Total VMs deployed over 48 months
(2 vCPUs/32GB Disk/4GB RAM/50 IOPS per VM)

    • 90000 vCPUs
    • 180,000 GB RAM
    • 1,440,000 GB Disk Space
    • 2,250,000 Host IOPS

Assuming 4 Building blocks per year, each Building Block would look something like this:

    • 2812 VMs per Building Block
    • 18 x Quad CPU – 10 Core Servera plus Hyperthreading (Maintains the 4:1 vCPU to Physical thread ratio)
    • 640GB Ram per server
    • 1216 x 300GB 15K disks in RAID10 (including spares) — one EMC Symmetrix VMAX for each Building Block
      • >90000GB Usable disk space (the 300GB disks are the smallest available but still too big and will provide quite a bit more space than the 90TB required. This would be a good candidate for EMC FASTVP sub-LUN tiering along with a few SSD disks, which would likely reduce the overall cost)
      • >140,000 Host IOPS

Hopefully this series of posts have shown that the Building Block approach is very flexible and can be adapted to fit a variety of different environments. Customers with environments ranging from very small to very large can tune individual Building Block designs for their needs to gain the advantages of isolated, repeatable deployments, and better long term use of capital.

Finally, if you find the benefits of the Building Block approach appealing, but would rather not deal with the integration of each Building Block, talk with a VCE representative about VBlock which provides all of the benefits I’ve discussed but in a pre-integrated, plug-and-play product with a single support organization supporting the entire solution.

Does your Building Block need a Fabric? <- Part 6

Building Blocks – Part V: Does your #PrivateCloud building block need a fabric?

Posted on by

Sizing your Building Block <- Part 5 -> I’m too small for Building Blocks

You may have noticed in the last installment that I did not include any FibreChannel switches in the example BOM. There are essentially three ways to deal with the SAN connectivity in a Building Block and there are advantages as well as disadvantages to each. (Note: this applies to iSCSI as well)

1.) Use switches that already exist in your datacenter: You can attach each storage array and each server back to a common fabric that you already have (or that you build as part of the project) and zone each of the Building Block’s servers to their respective storage array.

  • Advantages:
    • Leverage any existing fabric equipment to reduce costs and centralize management
    • Allow for additional servers to be added to each Building Block in the future
    • Allow for presenting storage from one Building Block to servers in a different Building Block (useful for migrations)
  • Disadvantages:
    • Increases complexity – Requires you to configure zoning within each Building Block during deployment
    • Increases chances for human error that could cause an outage – Accidentally deleting entire Zonesets or VSANs is not as uncommon as you might think
    • Reduces the availability isolation between Building Blocks – The fabric itself becomes a point-of-failure common to all Building Blocks.

2.) Deploy a dedicated fabric within each Building Block: Since each Building Block has a known quantity of storage and server ports, you can easily add a dual-switch/fabric into the design. In our example of 9 hosts you’d need a total of 18 ports for hosts and maybe 8 ports for the storage array for a combined total of 26 switch ports. Two 16-port switches can easily accommodate that requirement.

  • Advantages:
    • Depending on the switches used, it could allow for additional servers in each Building Block in the future
    • Allow for presenting storage from one Building Block to servers in a different building block (useful for migrations) by connecting ISLs between Building Blocks
    • Maintains the Building Block isolation by not sharing the fabric switches across Building Blocks.
  • Disadvantages:
    • Increases complexity – Requires you to configure zoning within each Building Block during deployment
    • Increases chances for human error that could cause an outage – Again, accidentally deleting entire Zonesets or VSANs is not as uncommon as you might think

3.) Dispense with the fabric entirely: Since Building Blocks are relatively small, resulting in fewer total initiator/target pairs, it’s possible in some cases to directly attach all of the hosts to the storage array. In our example, the nine hosts need eighteen ports and the VNX5700 supports up to twenty four FC ports. This means you can directly attach all of the hosts to the array and still have six remaining ports on the array for replication, etc. Different arrays from EMC as well as other vendors will have various limits on the number of FC ports supported. Also, not all vendors support direct attached hosts so you’ll need to check that with your storage vendor of choice to be sure.

  • Advantages:
    • Maintains the Building Block isolation by not sharing the fabric switches across Building Blocks.
    • Simplifies deployment by eliminating the need to do any zoning at all and effectively eliminates any port queue limits (HBA elevator depth settings)
    • Simplifies troubleshooting by eliminating the fabric (buffer to buffer credits, bandwidth, port errors, etc) from the IO path.
  • Disadvantages:
    • Limits the number of hosts per Building Block by the maximum number of ports supported by the storage array.
    • More difficult to non-disruptively migrate VMs between Building Blocks since storage cannot be shared across. (If all Building Blocks are in the same Virtual Data Center in VMWare vSphere, you can still live-migrate VMs via the IP network between Building Blocks using Storage vMotion)

If you decide that the host count limit is okay, and either non-disruptive migration between Building Blocks is unnecessary or Storage vMotion will work for you, then eliminating the fabric can reduce cost and complexity, while improving overall availability and time to deploy. If you need the flexibility of a fabric, I personally like using dedicated switches in each building block. Cisco and Brocade both offer 1U switches with up to 48 ports per switch that will work quite well. Always deploy two switches (as two fabrics) in each Building Block for redundancy.

Okay, so you’ve managed to calculate the size of your environment, how much time it will take you to virtualize it, the number of Building Blocks you need, and the specifications for each Building Block, including whether you need a fabric. Now you can submit your budget, get your final quotes, and place orders. Once the equipment arrives it’s time to implement the solution.

When your first Building Block arrives, it would be a valuable use of time to learn how to script the configuration for each component in the Building Block. An EMC VNX array can be completely configured using Naviseccli or PowerShell, from the Storage Pool and LUN provisioning to initiator registration and Host/LUN masking. VMWare vSphere can similarly be configured using scripts or PowerShell. If you take the time to develop and test your scripts against your first Building Block, then you can use those scripts to quickly stand up each additional Building Block you deploy. Since future Building Blocks will be nearly identical, if not entirely identical, the scripts can speed your deployment time immensely.

EMC Navisphere/Unisphere CLI (for VNX) is documented fully in the VNX Command Line Interface (CLI) Reference for Block 1.0 A02. This document is available on EMC PowerLink at the following location:

Home > Support > Technical Documentation and Advisories > Software ~ J-O ~ Documentation > Navisphere Management Suite > Maintenance/Administration

Be sure to leverage any storage vendor plug-ins available to you for your chosen hypervisor (VMWare, Hyper-V, etc) to improve visibility up and down the layers and reduce the number of management tools you need to use on a daily basis.

For example, EMC Unisphere Manager, the array management UI running on the VNX storage array, includes built-in integration with VMWare and other host operating systems. Unisphere Manager displays the VMFS datastores, RDMs, and VMs that are running on each LUN and a storage administrator can quickly search for VM names to help with management and/or troubleshooting tasks.

EMC also provides free downloadable plug-ins for VMWare vSphere and Hyper-V so server administrators can see what storage arrays and LUNs are behind their VMs and datastores. The plug-ins also allow administrators to provision new LUNs from the storage array through the plug-ins without needing access to the array management tools.

Depending on which storage vendor you choose, if you build a fabric-less Building Block, you may be able to do all of your server and storage administration from vCenter if you leverage the free plug-ins.

Sizing your Building Block <- Part 5 -> I’m too small for Building Blocks

Building Blocks – Part IV: Sizing Your #PrivateCloud Building Blocks

Posted on by

How many Building Blocks? <- Part 4 -> Does your Building Block need a Fabric?

Now that we know we’ll be deploying about 562 VM’s per Building Block we can use the other metrics to determine the requirements for a single block.

  • Since 562 VMs is about 12.5% of the 4500 total VMs, we then calculate 12.5% of the other metrics determined in the last post.
    • 12.5% of 9000 vCPUs = 1125 vCPUs
    • 12.5% of 4500GB RAM = 562GB RAM
    • 12.5% of 225,000 IOPS = 28125 Host IOPS
    • 12.5% of 562TB = 70TB Usable Disk capacity

First we’ll size the compute layer of the Building Block

  • At 4:1 vCPUs per Physical CPU thread you’d want somewhere around 281 hardware threads per Building Block. Using 4-socket, 8-core servers (32 cores per server) you’d need about 9 physical servers per building block. The number of vCPUs per physical CPU thread affects the % CPU Ready time in VMWare vSphere/ESX environments.
  • For 562GB of total RAM per Building Block, each server needs about 64GB of RAM
  • Per standard best practices, a highly available server needs two HBAs, more than two can be advantageous with high IOPS loads.

Next, we’ll calculate the storage layer of the Building Block

  • Assuming no cache hits, the backend disk load for 28,125 Host IOPS @ 50:50 read/write looks like the following:
    • RAID10 : 28125/2 + 28125/2*2 = 42187 Disk IOPS
    • RAID5 : 28125/2 + 28125/2*4 = 70312 Disk IOPS
    • RAID6 : 28125/2 + 28125/2*6 = 98437 Disk IOPS
  • If you calculate the number of disks required to meet the 70TB Usable in each RAID level, and the # of disks needed for both 10K RPM and 15K RPM disks to meet the IOPS for each RAID level, you’ll eventually find that for this specific example, using EMC Best Practices, 600GB 10K RPM SAS disks in RAID10 provides the least cost option (317 disks including hot spares). Since 10K RPM disks are also available in 2.5” sizes for some storage systems, this also provides the most compact solution in many cases (29 Rack Units for an EMC VNX storage array that has this configuration). In reality this is a very conservative configuration that ignores the benefits of storage array caching technologies and any other optimizations available, it’s essentially a worst case scenario and it would be beneficial to work with your storage vendor’s performance group to perform a more intelligent modeling of your workload.
  • Finally, you’ll need to select a storage array model that meets the requirements. Within EMC’s portfolio, 317 disks necessitate an EMC VNX5700 which will also have more than enough CPU horsepower to handle the 28125 host IOPS requirement.

At this point you’ve determined the basic requirements for a single Building Block which you can use as a starting point to work with your vendors for further tuning and pricing. Your vendors may also propose various optimizations that can help save you money and/or improve performance such as block-level tiering or extended SSD/Flash based caching.

Example bill-of-materials (BOM):

  • 9 x Quad-CPU/8-Core servers w/64GB RAM each
  • 2 x Single port FibreChannel HBAs
  • 1 x EMC VNX5700 Storage Array with 317 x 300GB 2.5” 10K SAS disks

Wait, where’s the fabric?

How many Building Blocks? <- Part 4 -> Does your Building Block need a Fabric?

Building Blocks – Part III: How Many Building Blocks does your #PrivateCloud need?

Posted on by

The Building Block Approach <- Part 3 -> Sizing your Building Block

The key to sizing Building Blocks is to calculate the ratio between the compute and storage metrics. First you need to take a look at the total performance and disk space requirements for the whole environment, similar to the below example:

  • Total # of Virtual Machines you expect to be hosting (example: 4500 VMs)
  • Total Virtual CPUs assigned to all Guest VMs (average of 2 vCPUs per VM = 9000 vCPUs)
  • Total Memory required across all Guest VMs (average of 1GB per VM = 4.5TB)
  • Total Host IOPS needed at the array for all Guest VMs (average of 50 IOPS per VM = 225,000 Host IOPS)
    • You will need to have a read/write ratio with this as well (we will use 50:50 for these examples)
  • Total Disk Storage required for all Guest VMs. (average of 125GB per VM = 562TB)

Once you have the above data, you need to decide how many Building Blocks you want to have once the entire environment is built out. There are several things to consider in determining this number:

  • How often you want to be deploying additional Building Blocks (more on this below)
  • Your annual budget (I’m ignoring budget for this example, but your budget may limit the size of your deployment each year)
  • How many VMs you think you can deploy in a year (we’ll use 2250 per year for a two year deployment)

Some of these are pretty subjective so your actual results will vary quite a bit, but based what I’ve seen I do have some recommendations.

  • In order to take advantage of the availability isolation inherent in the Building Block approach, you’ll want to start with at least two Building Blocks and then add them one or two at a time depending on how you want to spread your server farms across the infrastructure.
  • Depending on the size of each Building Block you may want to keep Building Block deployments down to one every 3-6 months. That gives you ample time to build each block correctly and hopefully leaves time between deployments to monitor and adjust the Building Blocks.

That said I’d lean toward 4 to 6 Building Blocks per year. Of course this is just my opinion and your mileage may vary. For our example of 4500 VMs over 2 years @ 4 Building Blocks per year. we’ll end up with 8 Building Blocks with about 562 VMs each.

The Building Block Approach <- Part 3 -> Sizing your Building Block

Building Blocks – Part II: The Building Block Approach to the #PrivateCloud

Posted on by

Build your own Private Cloud <- Part 2 -> How many Building Blocks

Since server virtualization abstracts the physical hardware from the operating systems and applications, essential for Cloud Infrastructures (also known as Infrastructure-as-a-Service), it’s ideally suited for breaking down the physical infrastructure into Building Blocks. Put simply, Building Blocks are repeatable, pre-designed mixes of storage, CPU, and memory.

There are several advantages to the Building Block approach that I’ll point out here:

  1. Rather than dropping a huge amount of capital up front on the entire infrastructure you need over the long haul, some of which will not be used at first, you can start with a smaller capital outlay today, then make multiple similarly small capital purchases only as needed. Further, when the hardware in a single Building Block reaches the end of its life (for any number of reasons), only that one Building Block will need to be refreshed at that time rather than a wholesale replacement of the entire environment.
  2. In an environment where virtualization is a new endeavor, sizing the compute, memory, and storage required is really an educated guess. As each Building Block is consumed, the real-world performance can be analyzed and adjusted for future Building Blocks to more closely match your specific workload.
  3. Building Blocks are inherently isolated which creates natural performance and availability boundaries. This can be leveraged for web and application server farms by spreading nodes of each farm across multiple Building Blocks. In the event of a catastrophic failure of one Building Block, due to major software bug affecting the cluster or the failure of an entire storage array for some reason, nodes of the server farm not hosted on the failed Building Block will be unaffected.
  4. The list price for storage arrays and servers goes down over time. If your growth is similar to many of my customers, where full build out of the physical infrastructure will not be required until 2-3 years after the start of the project, the acquisition cost of each individual Building Block will decrease over time, saving you money overall.
  5. In many cases, and due to a variety of factors, the cost to upgrade a storage array is higher than the cost to purchase the capacity with a new array. Upgrades also add complexity, complicate asset depreciation, and warranty renewals. The Building Block approach eliminates the majority of upgrades and the associated complexity.

Each Building Block can be maintained in its original build state or upgraded independent of the other building blocks so, for example, you don’t have to worry about upgrading every server in your datacenter with new HBA drivers if you decide to upgrade the storage array firmware on one array. You would only need to upgrade the servers in that arrays’ Building Block.

You may be thinking that your environment is not large enough to use a Building Block approach, but the more I worked on this project, the more I realized that Building Blocks can be adjusted to fit even very small environments. I’ll go into that a bit more later.

Build your own Private Cloud <- Part 2 -> How many Building Blocks