Dinners by Dad – Quick Tips – What the heck is zest of lemon?

Last week I made a Shrimp Lemon Pepper Linguini from a recipe on Allrecipes.com and along with the fresh squeezed lemon juice, the recipe called for “1/2 teaspoon of lemon zest”.  The first time I ran into this was with a risotto recipe a few weeks ago and I had to Google it since I literally had no idea what zesting a lemon was.  Those of you who have been cooking for years may take this knowledge for granted but if it was new to me I figure there may be other people (especially fellow take-out techies) who’d probably need to look it up.

So here it is…  your simple answer..  Zest = grated lemon rind

Essentially you use a small plane, small grater, or worst case a large cheese grater to grate just the yellow part of the lemon skin.  You don’t want the white part underneath the outer layer of yellow so you will need to keep turning the lemon to hit all of the outside skin for the best zest.

Another tip I found, if the recipe calls for juicing the lemon also, make sure you zest it first.  Once you juice it, the lemon will not be firm enough to make zesting an easy task.  So zest the lemon while it’s still whole, then cut it in half and juice it.

We have a small grater that I believe is for parmesan that seems to work well for the lemon zest.

More info..

Oh yeah, the Shrimp Lemon Pepper Fettucini was great also!

Category: cooking, recipes | Tags: , , , , , ,

Dinners by Dad – 2013 Week 3 – Maple Salmon

Okay, I know I’m technically skipping Weeks 1 and 2 but I figured I’d use calendar weeks and I started writing about this project several weeks after the project itself started…  oh well.

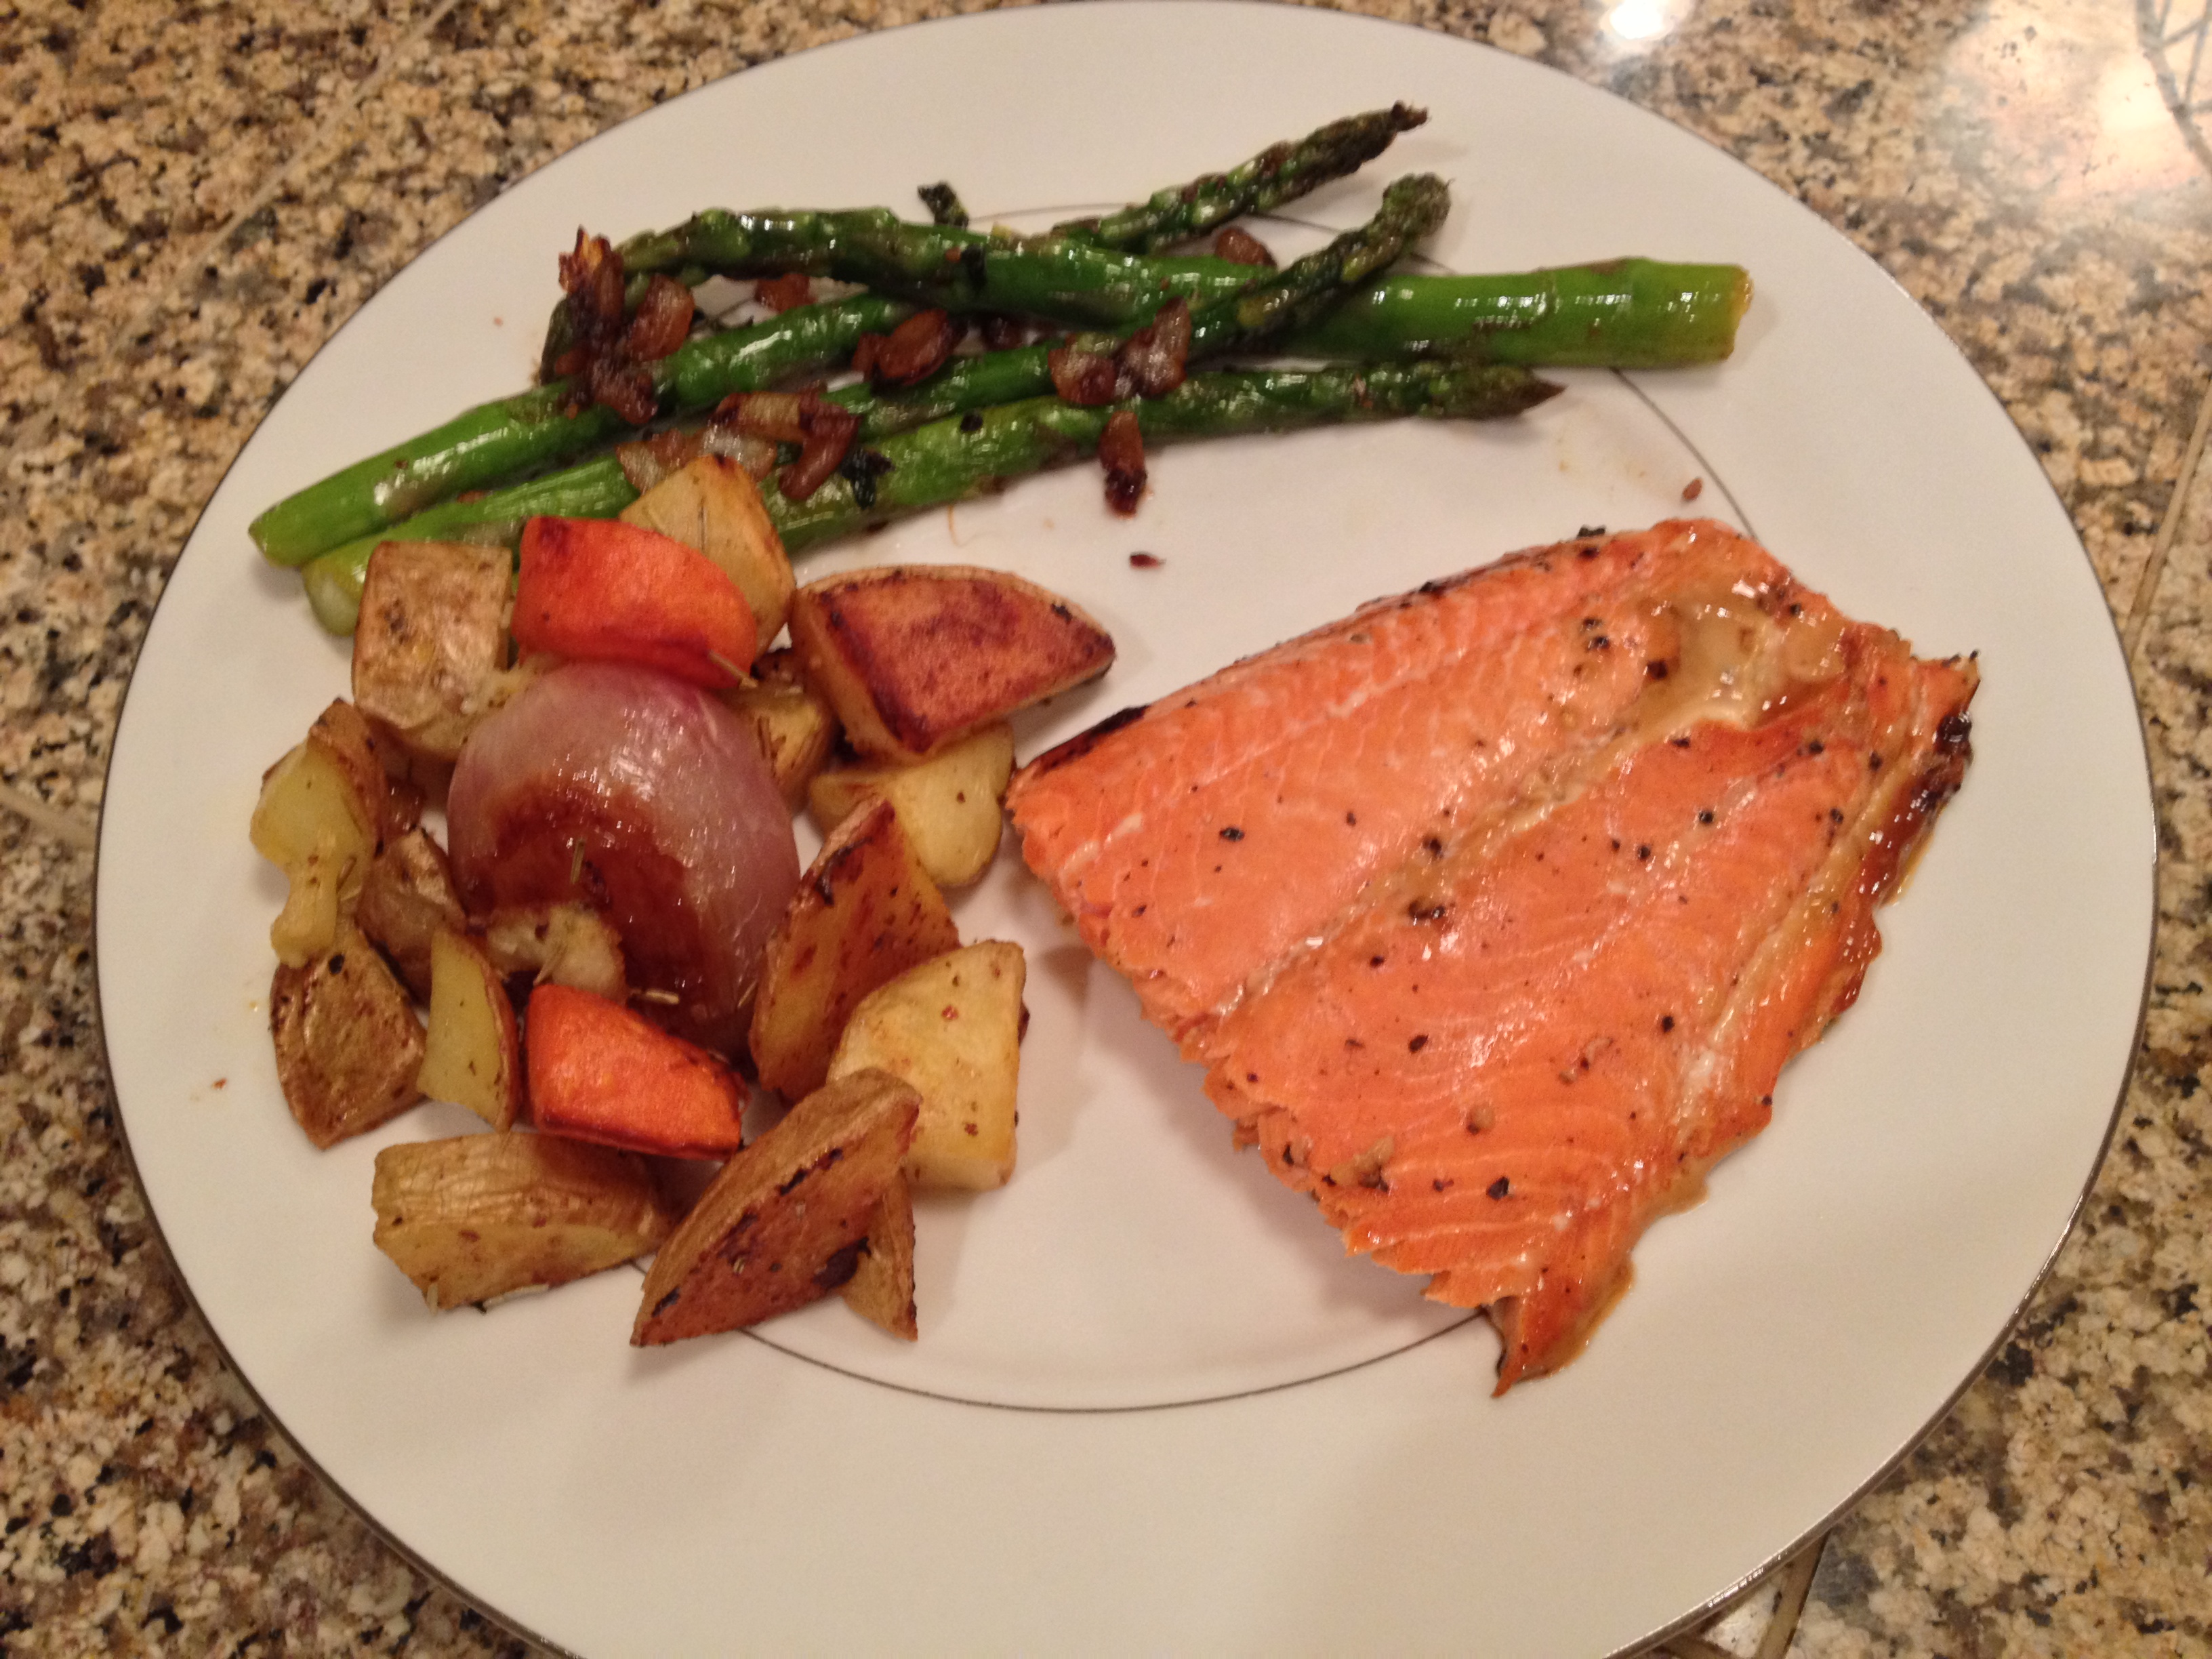
So tonight my work meetings finished up late and I didn’t get to the store until 5:30pm.  2013 week 2.1 ingredientsToday I actually attempted to find some recipes that used produce and/or meats we already have in the house.  This made it a little more difficult to settle on something that sounded inspired.  We had some potatoes, carrots, and shallots on hand and I’ve been dying to use shallots in something.  Seafood sounded good so I searched around for something with shellfish but didn’t find anything that sounded awesome and then I ran across a Maple glazed Salmon recipe that seemed easy and tasty.

Maple Salmon on Allrecipes.com

Asparagus seems to be the thing to make when we grill Salmon in the summer so I started searching for an asparagus dish and most of them are pretty basic.  For some reason when I was at the store I walked up and down the produce section about 5 times and never found asparagus.  So I quickly googled for “potato carrot shallot recipe” and found a roasted vegetable dish that sounded tasty.  Of course as soon as I found that recipe, I also found the asparagus so I decided to do both.

Roasted Potatoes, Carrots, and Shallots on Epicurious.com

For the asparagus, I improvised on an onion and asparagus recipe I found that called for sliced onions and onion salt.

Pan Fried Asparagus with Onions on Allrecipes.com

I chopped the onions for this instead of slicing because I thought it would fry up a bit better and I think it turned out really good.  The recipe also calls for “onion salt” which confused me.  I’ve heard of onion powder and garlic salt, but onion salt was a new one.  And I didn’t see any onion salt in the seasonings aisle at the store.  A quick google and I found multiple sites that essentially said it was 3 parts salt to 1 part garlic powder.  So fear not, it’s super simple to make.

On another note, peeling Shallots (which is needed for the roasted potatoes, etc dish) is a pain, a little more difficult than peeling garlic cloves and onions.  This tip seemed to help but I skipped the boiling water part.  Cutting the ends off and making a very shallow slit down one side with a sharp knife made a difference.

One of the other reasons I chose this potato dish over a couple others I found was that the oven temperature it called for was the same (400F) as the Maple Salmon so I was able to put both of them in the oven at the same time.  I started the veggies (which take about 10 minutes to prep and just under an hour to cook) and then worked on the Salmon next.  The Salmon dish calls for marinating for 20 minutes or so then baking for 20 minutes.  So I made the glaze, brushed it on, then put in the fridge.  About 20 minutes before the veggies were supposed to be done I put the Salmon in the oven.  In the meantime I had prepped the asparagus and onions (to which I added parsley and garlic as well) and in the last 10 minutes of baking I fried up the asparagus.  2013 week 2.1 dinnerEverything was done at about the same time and it was all pretty tasty.

A couple final comments..

I really liked the maple glaze for the Salmon, it was great.  I used dried Rosemary in the vegetables but I’m sure chopped fresh rosemary would be better.  From the time I started chopping veggies to putting the finished meal on the plate was an hour and 15 minutes.  There was enough downtime in between tasks that I was able to clean up most of the dishes also.  The roasted shallots were awesome too!

Dinners by Dad – The Basics

Over the past several weeks of cooking dinner I’ve really started to like it.  There’s something very technical about it that feeds my engineering mind.  It’s sort of cathartic actually, in part because it’s different from what I normally do each day.  It’s similar to sailing in that way as well since sailing requires you devote your mind to managing the sails, getting your mind off your day job while still working your brain.

Okay, let’s get started.

Recipe Ideas:

Since I’m not very creative when it comes to meal time I’ve resorted to Google for recipe ideas.  Most of the stuff I’ve found has been coming from the same couple web sites with Epicurious and Allrecipes.com being the most common.  Allrecipes.com has a cool recipe spinner app for iPhone that I’m using now where you select a type of meal (side, main course, salad, etc), then one primary ingredient (eggs, pork, pasta, etc), and a prep time (20 minutes, over an hour, etc) and it gives you a list of matching recipes.  Since it’s on the phone it makes shopping for the ingredients pretty handy.

Planning Time:

On my dinner nights I have set a calendar appointment for 3pm to remind me to start at least planning dinner.  Because my work schedule allows for it, I usually make a stop at the nearby grocery store at around 4:00 or 4:30pm to pick up anything I need and most days I’m browsing for recipes on my phone while I’m in the store.  This isn’t necessarily a good idea, it just happens to be the way it has worked out lately.  Ideally I would plan the day or night before, check the house for ingredients on the morning of, and make a shopping list for the stop on the way home.  Since I plan just a few hours before dinner and go straight from work to the store, I tend to buy things we already have.

Basic Tools:

A tablet, an iPad 2 in my case, is super handy for checking the recipes while you cook.  And since the web browsers typically support tabbed browsing you can have multiple recipes up in different tabs and switch back and forth while you cook.  Also, after I search for recipes on my phone’s browser and use that to shop, I then open the same recipe pages very easily on my iPad once in the kitchen because Safari and Chrome sync the open tabs between devices automatically.  If you use the Allrecipes.com Dinner Spinner app I mentioned above you can save favorites and create shopping lists that are accessible on your iPad and iPhone.

Since cooking is messy, you may want to find a way to protect your tablet from that mess.  There are a variety of cases you can use.  I haven’t personally addressed this issue yet, but I really want this Belkin Chefs Stand and Stylus which unfortunately seems hard to find.

You also need a set of good knives, pots, pans, and a pasta pot or pasta insert for another pot.  If you don’t use a pasta insert, your pasta will sometimes stick to the bottom and burn.  The insert keeps that from happening making pasta cooking almost hands free.

A word about knives:

If you don’t have a really good, sharp, knife you will get frustrated.  I happen to have a couple large sharp knives now and it’s made things much easier.  My favorite new knife is a chefs knife with a curved blade edge so you can rock it over vegetables.  It makes chopping small things (think cilantro, parsley, etc) remarkably easy while saving your fingers.

A word about Garlic:

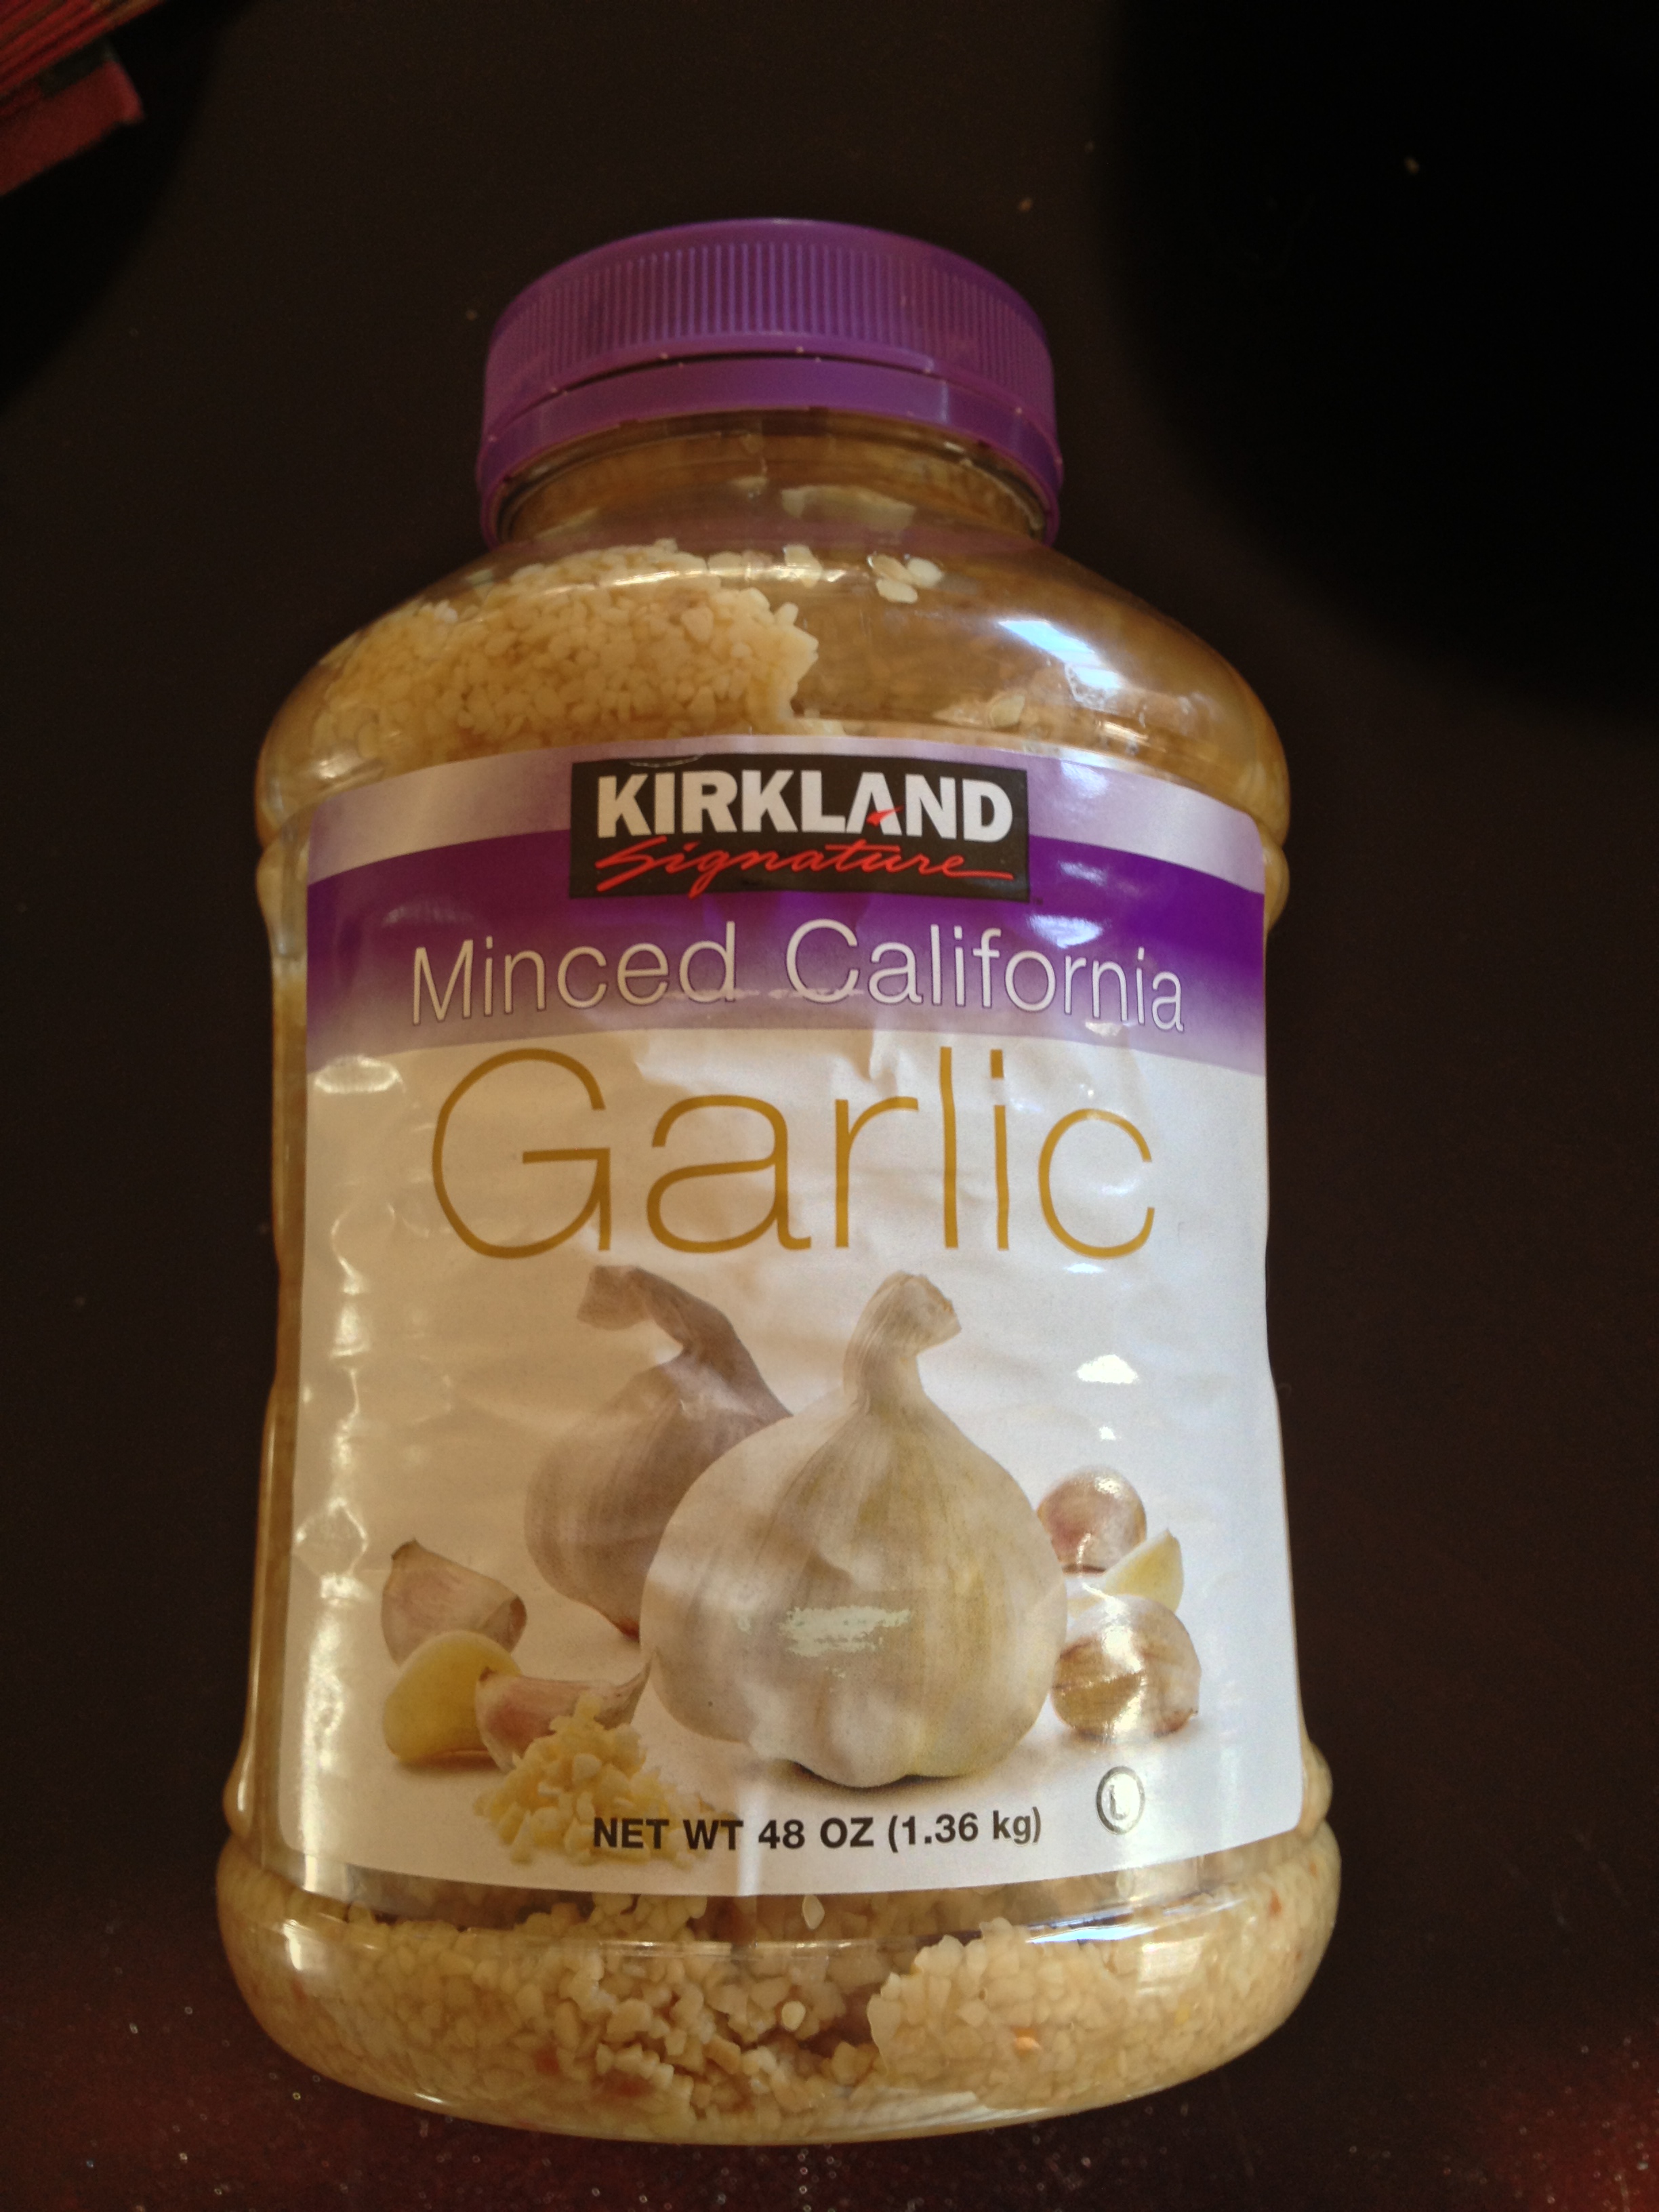
photo (4)Buy a ton of it! You can put garlic in pretty much anything and it’s good for you.  The easiest way to buy and use it is in the minced form.  You can get this super large container of minced garlic at Costco or many grocery stores and it lasts a long time.  1/2 teaspoon is equal to 1 clove of garlic.  Most recipes call for minced garlic anyway so this saves some time.  If I need full cloves for a recipe I usually just buy them the day of.

Remember the basic tenet of garlic is there is no such thing as too much garlic, so you really don’t have to measure it accurately.

Category: cooking, recipes | Tags: , , , ,

Dinners by Dad – An Engineer dad learning to make healthy and delicious dinners

Posted on by 0 comment aside

So my wife and I both work full time and we have two small children.  As you might imagine, life is pretty busy.  For the last couple years my wife has gotten more and more into cooking and preparation, even to the point of forming a “Freezer Cooking” Meetup for women to create make-ahead meals.  As a result I’ve been lucky in some ways that I’ve not had to spend much time in the kitchen for the past couple years.  Anyway, my second daughter was born 4 months ago and just after Thanksgiving my wife started back at work.  Work, home, and kids were already enough and then she decided to expand her law practice into California which requires several months of studying and prep for the California Bar.  Clearly something had to give so we made an agreement that it would be up to me to make sure there was dinner on Mondays and Wednesdays.  We picked these days more or less arbitrarily, it simply made sense to have it on a schedule of some kind since we both rely heavily on our calendars for work and home management.

Having been a bachelor for quite a few years before getting married, I am not the biggest chef.  When I cook, you can generally expect top ramen or if you are lucky, a pot of pasta and a jar of Classico sauce (which, by the way, is one of the best tasting and healthiest pre-made sauces around).  For several years, I actually ate dinner at a dive bar every night.  Accordingly, expectations for my meals are not high.

Spaghettis

The rules were simple for my dinner nights, actually only one real rule:  The meal must include some sort of veggie or salad to help make the meal somewhat healthy.  On the first night of my dinner reign, I stopped by my local Safeway and picked up a filet of Alaskan Salmon, combined it with some potatoes we had and pulled out some leftover apple salad that my wife had made for a party.  During the last few weeks of 2012 and into 2013, I’ve been experimenting with different meals and yes, I’ve been perfecting my spaghetti sauce, something I’ll post about later.

As inspiration and influence, earlier last year we spent two weeks on an amazing vacation in Italy and one of our takeaways was that the food we eat at home is too processed.  The quality of every meal in Italy was extraordinary, in part because the ingredients are all fresh and local at every restaurant.  Ever since that trip we’ve been making an extra effort to cook from fresh ingredients whenever possible.  We’ve started getting fresh produce delivered from a CSA and the neat thing about it is that it forces you to be creative with your meals, in order to use whatever fruits and veggies that you happen to get that week from the CSA.fresh-veggies

I’ve got to be honest, the veggie-with-every-meal requirement is actually much harder than I thought.  It’s easy to throw together a simple side salad but you can’t have the same old side salad every night so I have to find alternative ways to get veggies into the meal.  I’m not super creative when it comes to cooking but I’ve been getting better at this.

So now that I’ve set the stage, stay tuned as I write about my continuing journey from take-out techie to an engineer of extraordinary edibles!

Category: cooking, recipes | Tags: , , , , ,

The Flashing Clock Conspiracy

Posted on by

As I was driving to the office the other day I glanced at my iPhone and then back up to the dash, noticing that the clock in my car was a couple minutes off. ‘Gah! Why can’t the clock in my car keep time?’ This got me thinking about all of the devices in my life that have clocks built-in and the constant need to set and re-set them.

The proverbial “Big Bang” in the clock setting drama was when the very first VCR in the world was plugged in and it’s built-in clock started flashing “00:00”. After that the flashing clock syndrome has become a part of pop-culture and the problem has proliferated. Whenever there is a power outage, or electrical work requiring a breaker to be turned off in the house, I find myself asking the same question, “Why don’t these clocks synchronize themselves?” So I took a look at the evolution of time synchronization up to now.

  • Radio Broadcasters have been getting time, among other signals, from the US Atomic Clock since NIST began broadcasting time within radio signals across the US in 1945
  • In 1974, NIST began broadcasting time from NOAA satellites
  • In 1988, NIST began offering network time (Telephone and later Internet based)
  • In 1994, the GPS Satellite system became fully operational and due to it’s heavily reliance on accurate time, it became another source of very accurate time. Even cheap handheld GPS receivers get their time directly from the GPS satellites.
  • Mobile phones have been getting their time from the cellular network since at least the 90’s. Today’s smartphones and tablets use both the cellular network as well as Internet time (NTP) similar to personal computers.
  • Windows (Since Windows 2000), Mac (Since Mac OS 9 mainly), and Unix/Linux computers can set their own time from the network (NTP).

So as I look at all of the clocks I have in my life, I’m left wondering why I still have to set their time manually. For example…

  • My 4-year old BMW 535i has a built-in cellular radio, GPS receiver, satellite radio antenna, Bluetooth, and a fiber-optic ring network connecting every electronic device together. It can send all sorts of data to BMWAssist in the event of a crash or need for assistance, and it can download traffic data from radio signals. With all these systems available and integrated together, it can’t figure out the time?
  • Our Panasonic TV has Ethernet and Wi-Fi connectivity to connect to services like Netflix, Skype, Facebook, etc. Why doesn’t it use the same NTP servers as my Mac and Windows computers to get the time?
  • Our Keurig coffee maker has a clock so that it warms up the boiler in the morning before I wake up. The warm up feature is great but we unplug the Keurig sometimes to plug in other small appliances and then the clock needs to be set again when it’s plugged back in or it won’t warm up. Why not integrate a Bluetooth or small Wi-Fi receiver to get network time?
  • The Logitech Harmony Remote control we have in the living room has USB, RF, and Infrared and a clock that is NEVER correct. Hey Logitech, add a Wi-Fi radio, ditch the USB connection, let me program the remote over Wi-Fi, and sync the time automatically.

Actually, these last three got me thinking, consumer electronics manufacturers should come up with an industry standard way for all devices to talk to each other via a cheap, short range, low-bandwidth wireless connection (Bluetooth anyone?). It could be a sort of mesh-network where each device can communicate with the next closest device to get access to other devices in the home, and they could all share information that each device might be authoritative for. One device might be a network connected Blu-Ray player that knows the time. Other devices might know what time you wake up in the morning (the Keurig for example) and provide that information so that the cable box knows to set the channel to the morning news before you even turn on the TV. And synchronize all of the clocks!!!

But then, I have to wonder why some devices even need a clock?

I understand why the oven has a clock since it has the ability to start cooking on a schedule, but why the microwave? Most microwaves don’t have any sort of start-timer function, so why do they need a clock? There are already so many clocks in the house; I’d argue that adding one to a device that doesn’t need it is just creating an undue burden on the user. For the love of Pete! If there is no reason for it, and it doesn’t set itself, leave the clock out!

What say you?

Toaster Oven Recipes – Breakfast Sandwich

After being frustrated with our normal toaster to the point that we tossed it, I received a new Breville Convection Toaster Oven for Christmas and it has proven to be really useful.  I’ve been trying it out on various meals that would normally use the oven, range, or microwave and so far the results have been very good. Today I experimented with a home made breakfast sandwich using some ingredients I found in the fridge.  Since it was tasty and took less than 10 minutes to make I thought I’d share.  This *may* be the first in a continuing series of Toaster Oven Recipes.  Okay, lets begin..

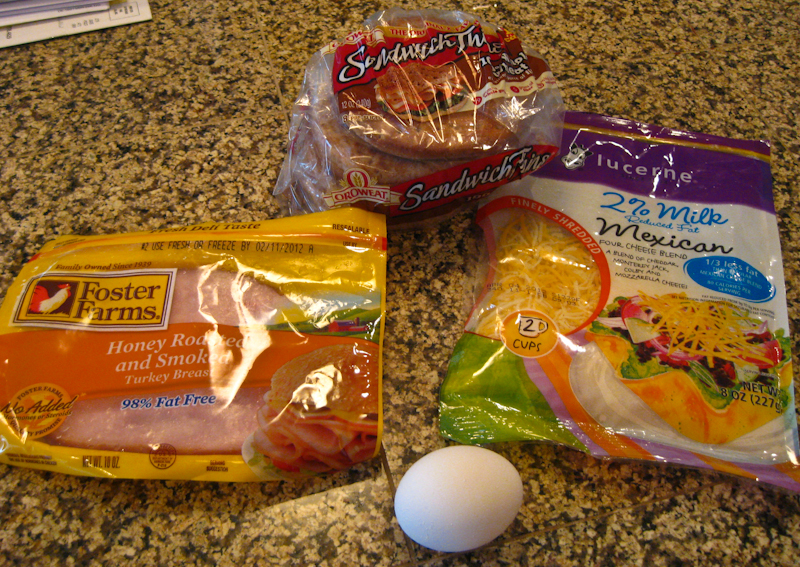
Ingredients:

  • 1 Slice – Deli Sliced Honey Roasted/Smoked Turkey Breast
  • 1/4 Cup – 4-Cheese Mexican Blend Shredded Cheese
  • 1 – Fresh AA Large Egg
  • 1 Roll – Whole Wheat Sandwich Thins
  • 1 Tblsp – Butter (Optional) (or some other type of spread you like)

I just happened to have these flavors and brands in the fridge, you can adjust based on what you have in your fridge or to your preferred tastes.

Preparation:

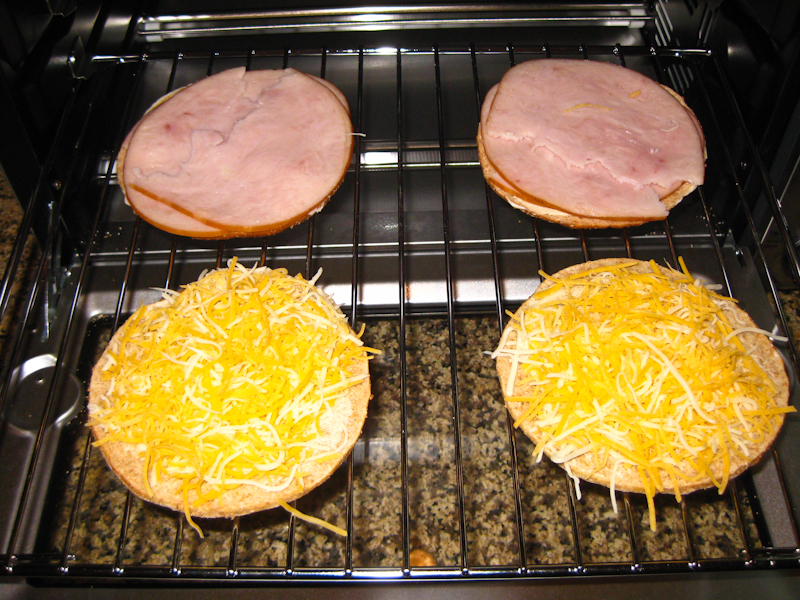
First, separate the two halves of the Sandwich Thin Roll and place face up.  Spread butter on the inside faces of the rolls if desired. Tear one slice of Turkey in half and cover one half of the roll overlapping the two turkey pieces to fit the roll.

Sprinkle the shredded cheese to cover the second roll half evenly.

Cooking:

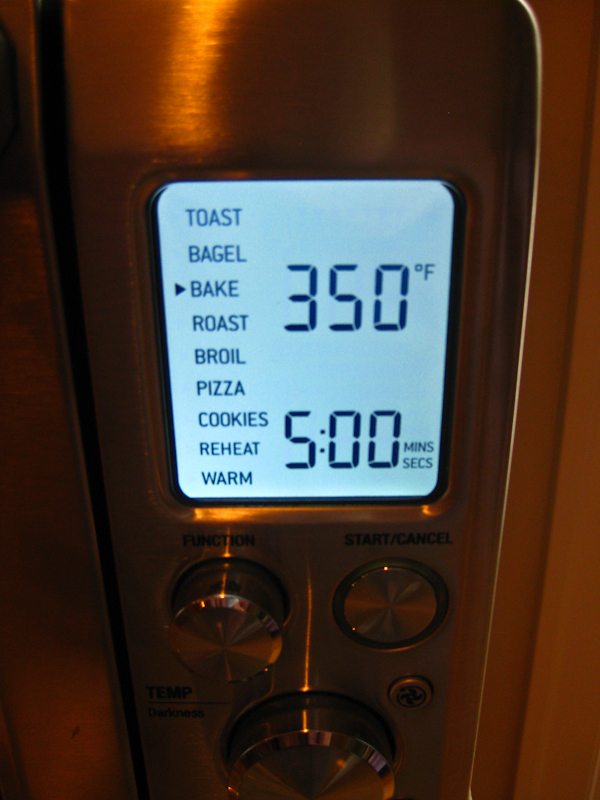
Place both roll halves on the middle rack of the toaster oven, set to Bake, 350 deg, 5 minutes.  (My Breville Oven preheats first, then starts the countdown timer once preheating is complete.  This actually works out well as I’ll describe in a moment.)

Next, crack the egg into a small pan (I happen to have a really small pan that is about the same diameter as the Sandwich Thins) on on the stove and break the yolk.  Allow the egg to cook on medium heat.

Meanwhile, the oven will beep when preheating is complete and start the 5 minute countdown.  Remove the cheese covered half from the oven and allow the meat side to continue cooking.

When the egg is nearly cooked you may want to flip it one time to finish the top, then remove it from the stove and place it on top of the cheese covered roll.  The egg will be done just about the same time as the 5 minute oven timer.  Remove the roll from the toaster oven and put the two halves together to make the full egg, cheese, turkey sandwich.

Nutrition Information: (I am not making any health claims, I am simply providing this for informational purposes)

1 Egg, 1 Slice Turkey, Sandwich Thin, Cheese

  • 300 calories
  • 14.5g fat
  • 24.4g carbs
  • 23.3g protein

Optional butter adds 102 calories and 11g fat. (Other spreads or skipping the butter may be a good idea if your are trying to keep your calories and/or fat intake down.)

Building Blocks – Part VI: But my #PrivateCloud is too small (or too big) for building blocks!

Posted on by

Does your Building Block need a Fabric? <- Part 6

Okay, so this is all well and good, but you have been reading these posts and thinking that your environment is nowhere near the size of my example so Building Blocks are not for you. The fact is you can make individual Building Blocks quite a bit smaller or larger than the example I used in these posts and I’ll use a couple more quick examples to illustrate.

Small Environment: In this example, we’ll break down a 150 VM environment into three Building Blocks to provide the availability benefit of multiple isolated blocks. Additional Building Blocks can be deployed as the environment grows.

150 Total VMs deployed over 12 months
(2 vCPUs/32GB Disk/1GB RAM/25 IOPS per VM)

    • 300 vCPUs
    • 150GB RAM
    • 4800 GB Disk Space
    • 3750 Host IOPS

Assuming 3 Building Blocks, each Building Block would look something like this:

    • 50 VMs per Building Block
    • 2 x Dual CPU – 6 Core Servers (Maintains the 4:1 vCPU to Physical thread ratio)
    • 24-32GB RAM per server
    • 19 x 300GB 10K disks in RAID10 (including spares) — any VNXe or VNX model will be fine for this
      • >1600GB Usable disk space (this disk config provides more disk space and performance than required)
      • >1250 Host IOPS

Very Large Environment: In this example, we’ll scale up to 45,000 VMs using sixteen Building Blocks to provide the availability benefit of multiple isolated blocks. Additional Building Blocks can be deployed as the environment grows.

45000 Total VMs deployed over 48 months
(2 vCPUs/32GB Disk/4GB RAM/50 IOPS per VM)

    • 90000 vCPUs
    • 180,000 GB RAM
    • 1,440,000 GB Disk Space
    • 2,250,000 Host IOPS

Assuming 4 Building blocks per year, each Building Block would look something like this:

    • 2812 VMs per Building Block
    • 18 x Quad CPU – 10 Core Servera plus Hyperthreading (Maintains the 4:1 vCPU to Physical thread ratio)
    • 640GB Ram per server
    • 1216 x 300GB 15K disks in RAID10 (including spares) — one EMC Symmetrix VMAX for each Building Block
      • >90000GB Usable disk space (the 300GB disks are the smallest available but still too big and will provide quite a bit more space than the 90TB required. This would be a good candidate for EMC FASTVP sub-LUN tiering along with a few SSD disks, which would likely reduce the overall cost)
      • >140,000 Host IOPS

Hopefully this series of posts have shown that the Building Block approach is very flexible and can be adapted to fit a variety of different environments. Customers with environments ranging from very small to very large can tune individual Building Block designs for their needs to gain the advantages of isolated, repeatable deployments, and better long term use of capital.

Finally, if you find the benefits of the Building Block approach appealing, but would rather not deal with the integration of each Building Block, talk with a VCE representative about VBlock which provides all of the benefits I’ve discussed but in a pre-integrated, plug-and-play product with a single support organization supporting the entire solution.

Does your Building Block need a Fabric? <- Part 6

Building Blocks – Part V: Does your #PrivateCloud building block need a fabric?

Posted on by

Sizing your Building Block <- Part 5 -> I’m too small for Building Blocks

You may have noticed in the last installment that I did not include any FibreChannel switches in the example BOM. There are essentially three ways to deal with the SAN connectivity in a Building Block and there are advantages as well as disadvantages to each. (Note: this applies to iSCSI as well)

1.) Use switches that already exist in your datacenter: You can attach each storage array and each server back to a common fabric that you already have (or that you build as part of the project) and zone each of the Building Block’s servers to their respective storage array.

  • Advantages:
    • Leverage any existing fabric equipment to reduce costs and centralize management
    • Allow for additional servers to be added to each Building Block in the future
    • Allow for presenting storage from one Building Block to servers in a different Building Block (useful for migrations)
  • Disadvantages:
    • Increases complexity – Requires you to configure zoning within each Building Block during deployment
    • Increases chances for human error that could cause an outage – Accidentally deleting entire Zonesets or VSANs is not as uncommon as you might think
    • Reduces the availability isolation between Building Blocks – The fabric itself becomes a point-of-failure common to all Building Blocks.

2.) Deploy a dedicated fabric within each Building Block: Since each Building Block has a known quantity of storage and server ports, you can easily add a dual-switch/fabric into the design. In our example of 9 hosts you’d need a total of 18 ports for hosts and maybe 8 ports for the storage array for a combined total of 26 switch ports. Two 16-port switches can easily accommodate that requirement.

  • Advantages:
    • Depending on the switches used, it could allow for additional servers in each Building Block in the future
    • Allow for presenting storage from one Building Block to servers in a different building block (useful for migrations) by connecting ISLs between Building Blocks
    • Maintains the Building Block isolation by not sharing the fabric switches across Building Blocks.
  • Disadvantages:
    • Increases complexity – Requires you to configure zoning within each Building Block during deployment
    • Increases chances for human error that could cause an outage – Again, accidentally deleting entire Zonesets or VSANs is not as uncommon as you might think

3.) Dispense with the fabric entirely: Since Building Blocks are relatively small, resulting in fewer total initiator/target pairs, it’s possible in some cases to directly attach all of the hosts to the storage array. In our example, the nine hosts need eighteen ports and the VNX5700 supports up to twenty four FC ports. This means you can directly attach all of the hosts to the array and still have six remaining ports on the array for replication, etc. Different arrays from EMC as well as other vendors will have various limits on the number of FC ports supported. Also, not all vendors support direct attached hosts so you’ll need to check that with your storage vendor of choice to be sure.

  • Advantages:
    • Maintains the Building Block isolation by not sharing the fabric switches across Building Blocks.
    • Simplifies deployment by eliminating the need to do any zoning at all and effectively eliminates any port queue limits (HBA elevator depth settings)
    • Simplifies troubleshooting by eliminating the fabric (buffer to buffer credits, bandwidth, port errors, etc) from the IO path.
  • Disadvantages:
    • Limits the number of hosts per Building Block by the maximum number of ports supported by the storage array.
    • More difficult to non-disruptively migrate VMs between Building Blocks since storage cannot be shared across. (If all Building Blocks are in the same Virtual Data Center in VMWare vSphere, you can still live-migrate VMs via the IP network between Building Blocks using Storage vMotion)

If you decide that the host count limit is okay, and either non-disruptive migration between Building Blocks is unnecessary or Storage vMotion will work for you, then eliminating the fabric can reduce cost and complexity, while improving overall availability and time to deploy. If you need the flexibility of a fabric, I personally like using dedicated switches in each building block. Cisco and Brocade both offer 1U switches with up to 48 ports per switch that will work quite well. Always deploy two switches (as two fabrics) in each Building Block for redundancy.

Okay, so you’ve managed to calculate the size of your environment, how much time it will take you to virtualize it, the number of Building Blocks you need, and the specifications for each Building Block, including whether you need a fabric. Now you can submit your budget, get your final quotes, and place orders. Once the equipment arrives it’s time to implement the solution.

When your first Building Block arrives, it would be a valuable use of time to learn how to script the configuration for each component in the Building Block. An EMC VNX array can be completely configured using Naviseccli or PowerShell, from the Storage Pool and LUN provisioning to initiator registration and Host/LUN masking. VMWare vSphere can similarly be configured using scripts or PowerShell. If you take the time to develop and test your scripts against your first Building Block, then you can use those scripts to quickly stand up each additional Building Block you deploy. Since future Building Blocks will be nearly identical, if not entirely identical, the scripts can speed your deployment time immensely.

EMC Navisphere/Unisphere CLI (for VNX) is documented fully in the VNX Command Line Interface (CLI) Reference for Block 1.0 A02. This document is available on EMC PowerLink at the following location:

Home > Support > Technical Documentation and Advisories > Software ~ J-O ~ Documentation > Navisphere Management Suite > Maintenance/Administration

Be sure to leverage any storage vendor plug-ins available to you for your chosen hypervisor (VMWare, Hyper-V, etc) to improve visibility up and down the layers and reduce the number of management tools you need to use on a daily basis.

For example, EMC Unisphere Manager, the array management UI running on the VNX storage array, includes built-in integration with VMWare and other host operating systems. Unisphere Manager displays the VMFS datastores, RDMs, and VMs that are running on each LUN and a storage administrator can quickly search for VM names to help with management and/or troubleshooting tasks.

EMC also provides free downloadable plug-ins for VMWare vSphere and Hyper-V so server administrators can see what storage arrays and LUNs are behind their VMs and datastores. The plug-ins also allow administrators to provision new LUNs from the storage array through the plug-ins without needing access to the array management tools.

Depending on which storage vendor you choose, if you build a fabric-less Building Block, you may be able to do all of your server and storage administration from vCenter if you leverage the free plug-ins.

Sizing your Building Block <- Part 5 -> I’m too small for Building Blocks

Building Blocks – Part IV: Sizing Your #PrivateCloud Building Blocks

Posted on by

How many Building Blocks? <- Part 4 -> Does your Building Block need a Fabric?

Now that we know we’ll be deploying about 562 VM’s per Building Block we can use the other metrics to determine the requirements for a single block.

  • Since 562 VMs is about 12.5% of the 4500 total VMs, we then calculate 12.5% of the other metrics determined in the last post.
    • 12.5% of 9000 vCPUs = 1125 vCPUs
    • 12.5% of 4500GB RAM = 562GB RAM
    • 12.5% of 225,000 IOPS = 28125 Host IOPS
    • 12.5% of 562TB = 70TB Usable Disk capacity

First we’ll size the compute layer of the Building Block

  • At 4:1 vCPUs per Physical CPU thread you’d want somewhere around 281 hardware threads per Building Block. Using 4-socket, 8-core servers (32 cores per server) you’d need about 9 physical servers per building block. The number of vCPUs per physical CPU thread affects the % CPU Ready time in VMWare vSphere/ESX environments.
  • For 562GB of total RAM per Building Block, each server needs about 64GB of RAM
  • Per standard best practices, a highly available server needs two HBAs, more than two can be advantageous with high IOPS loads.

Next, we’ll calculate the storage layer of the Building Block

  • Assuming no cache hits, the backend disk load for 28,125 Host IOPS @ 50:50 read/write looks like the following:
    • RAID10 : 28125/2 + 28125/2*2 = 42187 Disk IOPS
    • RAID5 : 28125/2 + 28125/2*4 = 70312 Disk IOPS
    • RAID6 : 28125/2 + 28125/2*6 = 98437 Disk IOPS
  • If you calculate the number of disks required to meet the 70TB Usable in each RAID level, and the # of disks needed for both 10K RPM and 15K RPM disks to meet the IOPS for each RAID level, you’ll eventually find that for this specific example, using EMC Best Practices, 600GB 10K RPM SAS disks in RAID10 provides the least cost option (317 disks including hot spares). Since 10K RPM disks are also available in 2.5” sizes for some storage systems, this also provides the most compact solution in many cases (29 Rack Units for an EMC VNX storage array that has this configuration). In reality this is a very conservative configuration that ignores the benefits of storage array caching technologies and any other optimizations available, it’s essentially a worst case scenario and it would be beneficial to work with your storage vendor’s performance group to perform a more intelligent modeling of your workload.
  • Finally, you’ll need to select a storage array model that meets the requirements. Within EMC’s portfolio, 317 disks necessitate an EMC VNX5700 which will also have more than enough CPU horsepower to handle the 28125 host IOPS requirement.

At this point you’ve determined the basic requirements for a single Building Block which you can use as a starting point to work with your vendors for further tuning and pricing. Your vendors may also propose various optimizations that can help save you money and/or improve performance such as block-level tiering or extended SSD/Flash based caching.

Example bill-of-materials (BOM):

  • 9 x Quad-CPU/8-Core servers w/64GB RAM each
  • 2 x Single port FibreChannel HBAs
  • 1 x EMC VNX5700 Storage Array with 317 x 300GB 2.5” 10K SAS disks

Wait, where’s the fabric?

How many Building Blocks? <- Part 4 -> Does your Building Block need a Fabric?

Building Blocks – Part III: How Many Building Blocks does your #PrivateCloud need?

Posted on by

The Building Block Approach <- Part 3 -> Sizing your Building Block

The key to sizing Building Blocks is to calculate the ratio between the compute and storage metrics. First you need to take a look at the total performance and disk space requirements for the whole environment, similar to the below example:

  • Total # of Virtual Machines you expect to be hosting (example: 4500 VMs)
  • Total Virtual CPUs assigned to all Guest VMs (average of 2 vCPUs per VM = 9000 vCPUs)
  • Total Memory required across all Guest VMs (average of 1GB per VM = 4.5TB)
  • Total Host IOPS needed at the array for all Guest VMs (average of 50 IOPS per VM = 225,000 Host IOPS)
    • You will need to have a read/write ratio with this as well (we will use 50:50 for these examples)
  • Total Disk Storage required for all Guest VMs. (average of 125GB per VM = 562TB)

Once you have the above data, you need to decide how many Building Blocks you want to have once the entire environment is built out. There are several things to consider in determining this number:

  • How often you want to be deploying additional Building Blocks (more on this below)
  • Your annual budget (I’m ignoring budget for this example, but your budget may limit the size of your deployment each year)
  • How many VMs you think you can deploy in a year (we’ll use 2250 per year for a two year deployment)

Some of these are pretty subjective so your actual results will vary quite a bit, but based what I’ve seen I do have some recommendations.

  • In order to take advantage of the availability isolation inherent in the Building Block approach, you’ll want to start with at least two Building Blocks and then add them one or two at a time depending on how you want to spread your server farms across the infrastructure.
  • Depending on the size of each Building Block you may want to keep Building Block deployments down to one every 3-6 months. That gives you ample time to build each block correctly and hopefully leaves time between deployments to monitor and adjust the Building Blocks.

That said I’d lean toward 4 to 6 Building Blocks per year. Of course this is just my opinion and your mileage may vary. For our example of 4500 VMs over 2 years @ 4 Building Blocks per year. we’ll end up with 8 Building Blocks with about 562 VMs each.

The Building Block Approach <- Part 3 -> Sizing your Building Block